Your Guide to the Over the Door Pulley Exerciser
An over-the-door pulley exerciser is one of the simplest, most effective tools we use to help people get their shoulder moving again. It’s a basic rope-and-pulley system that hooks over any standard door, letting you use your good arm to gently guide your stiff or injured arm through controlled movements.
Unpacking the Over the Door Pulley Exerciser
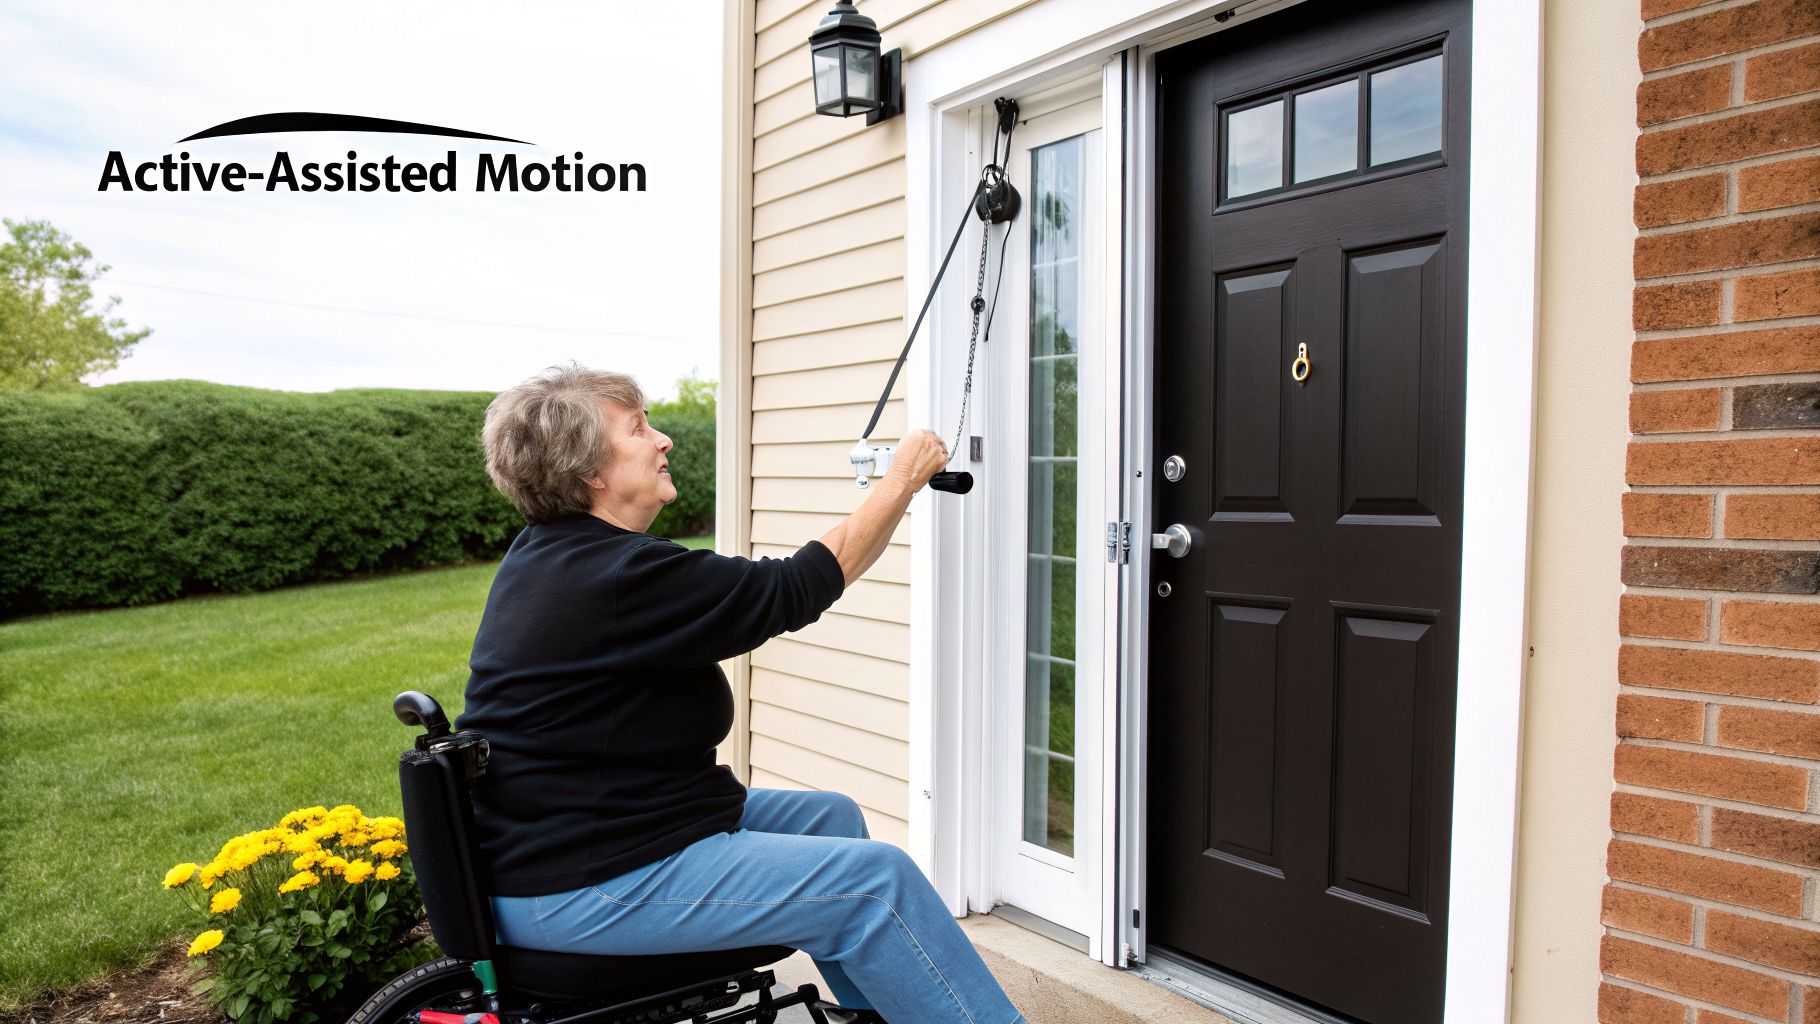
Think of the over-the-door pulley as a bridge between your formal physical therapy sessions and your recovery at home. It’s designed to help you perform what we call active-assisted range of motion (AAROM). This is a game-changer in shoulder rehab.
Unlike passive motion, where a therapist moves your arm for you, or active motion, where you do all the work, AAROM is the best of both worlds. Your "good" arm helps your recovering one, providing just enough support to move the joint a little further than you could on your own—without causing pain or reinjury. It’s like having your healthy side act as a personal therapist, guiding the injured one perfectly.
This gentle, controlled movement is so important for a few key reasons:
- It fights stiffness. By encouraging safe movement, the pulley helps prevent the scar tissue and adhesions that can lead to a "frozen" shoulder.
- It boosts circulation. Gentle motion brings blood flow and nutrients to the injured tissues, which is vital for healing rotator cuff injuries or recovering from surgery.
- It retrains your brain and muscles. The exercises help re-establish normal, healthy movement patterns, teaching your body how to move correctly again.
Who Can Benefit from an Over the Door Pulley?
This simple tool is a go-to for a wide range of shoulder issues. We've seen it make a huge difference for people from all walks of life, helping them regain independence and get back to their daily activities.
| Patient Profile | Common Conditions | Primary Benefit |
|---|---|---|
| Post-Surgical Patients | Rotator cuff repair, shoulder replacement, fracture fixation | Gently restores motion without stressing the surgical repair, preventing post-op stiffness. |
| Individuals with Frozen Shoulder | Adhesive capsulitis | Safely and progressively increases range of motion, helping to "unfreeze" the joint. |
| Rotator Cuff Rehab Patients | Tendinitis, bursitis, minor tears | Reduces pain and improves function by encouraging pain-free movement and blood flow. |
| Seniors or Those with Limited Mobility | Arthritis, general deconditioning, post-stroke | Provides a safe way to maintain shoulder health and perform gentle exercise while seated. |
For many, using a pulley is the first step toward feeling in control of their recovery again. It's a practical, low-cost way to make progress every single day.
A Cornerstone of Modern Rehabilitation
The pulley might look simple, but its impact is huge. These devices have evolved from basic setups used in post-World War II hospitals to become a staple in rehab centers everywhere. The global market for exercise pulleys is even projected to hit USD 816.9 million by 2026, with Europe accounting for over 30% of that. This isn't just a trend; it's a reflection of how essential this tool is for recovery.
The reason it works so well is that it provides a safe way to move a joint that's too painful or stiff to move on its own. When you're dealing with a new injury, understanding why this gentle approach is so important can make a real difference. For instance, knowing the difference between a shoulder strain or sprain helps clarify why assisted motion is critical for healing specific tissues without causing more damage.
At MedAmerica Rehab, we often call the pulley a "permission-giver." It gives your shoulder permission to move in a safe, supported way. That’s often the biggest and most important step toward regaining function and confidence after an injury.
Ultimately, this device isn't just a piece of equipment. It’s a way for you to take an active role in your own healing, empowering you to make real progress from the comfort of home. It’s a fundamental tool for managing everything from post-op stiffness to the chronic ache of tendinitis.
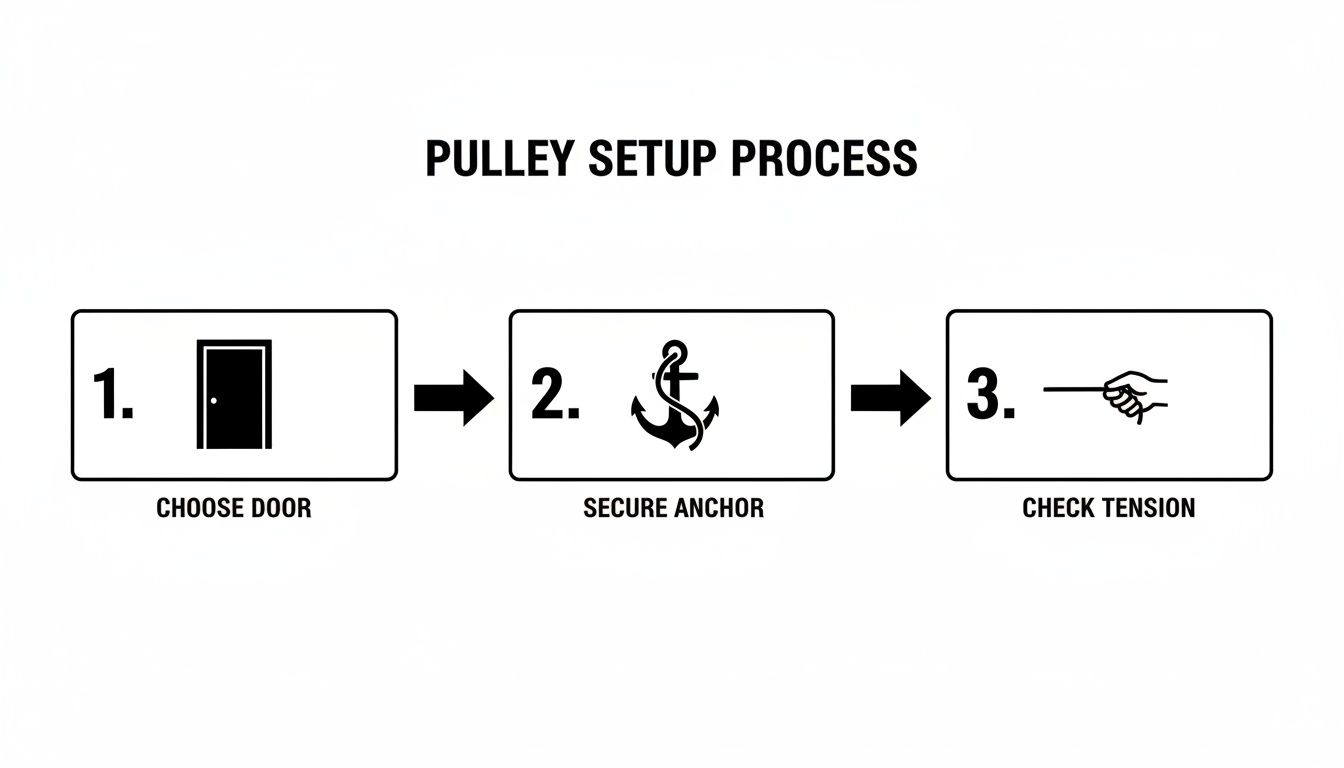
How to Safely Set Up Your Pulley Exerciser at Home
Getting your over the door pulley exerciser set up correctly is the first, most important step for safe and effective home therapy. It only takes a few minutes, but doing it right prevents accidents and makes sure every single movement is helping you recover.
Think of it as the foundation for your rehab. A shaky setup will only lead to shaky results.
These are the same simple, practical instructions we give our patients here at MedAmerica Rehab Center. Follow them, and you’ll have a secure therapy space in your own home, letting you focus completely on your exercises.
Choosing the Right Location
Your first task is picking the right door. This is a huge safety decision, because not all doors are built the same, and a flimsy one is a serious hazard.
Find a solid-core door, not a hollow-core one. A quick knock will tell you what you have. A solid door sounds dense and muffled, while a hollow one echoes. That solid core provides the stability you need to handle the pulling forces of the exercises.
You also need a door that closes firmly and latches all the way. The door absolutely must stay closed while you're exercising. The best spot is a room where you can lock the door from the inside, preventing anyone from walking in and opening it by surprise.
Securing the Anchor Correctly
Once you have your sturdy door, it’s time to get the anchor in place. Most pulley kits come with a webbing strap anchor, which is very simple to use.
- Open the door and sling the anchor strap over the top. Make sure the pulley itself will hang on the side of the door where you'll be doing your exercises.
- The strap must sit perfectly flat against the top edge of the door. Don't let it get bunched up or twisted.
- Close the door until it clicks shut. If you can, lock it. This is what keeps the door from swinging open when you start pulling.
Therapist Tip: Before you start your first exercise, give the pulley rope a few sharp, firm tugs straight down. The anchor shouldn't move at all. This "tug test" is a non-negotiable step we teach everyone. It takes five seconds and confirms your setup is safe and ready.
Adjusting the Rope for Your Height
With the anchor secure, the last step is adjusting the rope length for your body. The right length allows a full, comfortable range of motion without making you overreach or slouch.
- If you’re sitting: Sit in a sturdy chair without arms, facing the door. The handles should be at a height where you can easily grab them with a slight bend in your elbows.
- If you’re standing: Stand facing the door. The handles should hang right around your waist level.
Most pulley systems make it easy to shorten the rope—just pull the extra line through the handles and tie a new knot. You want just enough slack to complete the full movement, but not so much that the handles are hitting the floor. Don’t be afraid to fiddle with it until it feels perfect.
A really common mistake we see is setting the rope too long. This almost always encourages bad posture, like shrugging your shoulders. Taking a moment to get the length just right makes a huge difference in the quality of your exercise and the speed of your recovery.
Core Exercises for Shoulder Mobility and Recovery
Once your over the door pulley exerciser is securely set up, you're ready for the most important part of your home therapy: the exercises themselves. This is where your active recovery truly begins. The movements we’re about to cover are the fundamentals our MedAmerica therapists prescribe to help you restore shoulder mobility, calm pain, and build a solid foundation for strength.
We’ll be using a technique called active-assisted range of motion (AAROM). It sounds technical, but the idea is simple. Your healthy, unaffected arm will do most of the work, gently guiding your recovering arm through the movements. The goal is always a smooth, pain-free stretch, never a forceful pull. Your body is the ultimate guide—if you feel any sharp or pinching pain, it's time to stop.
Before you start any exercise, a quick safety check is essential. This simple visual guide walks you through the key steps.
You’re just making sure you’ve chosen a solid door, secured the anchor properly, and given the pulley a good tug to confirm it’s not going anywhere.
Mastering Shoulder Flexion
Shoulder flexion is simply lifting your arm straight out in front of you. After an injury or surgery, this is often one of the toughest movements to get back, but the pulley makes it much more manageable.
- Get into position: Sit in a sturdy chair with your back to the door, about an arm’s length away. Keep your feet flat on the floor and your posture upright. Grab a handle in each hand with your palms facing the floor.
- Start the movement: Use your good arm to gently pull down on its handle. As you pull, your affected arm will be passively lifted forward and up. Only go as high as you can without pain or major strain.
- Find your goal: You should feel a gentle stretch at the top of the motion. Hold it there for just a moment, then slowly lower the arm back down by letting your good arm rise. All the control should come from your healthy side.
A common mistake we see in the clinic is people leaning back or shrugging their shoulders to get more height. Fight that urge. Keep your torso still and your shoulder blade down. The quality of the movement is what counts, not how high you can lift.
Performing Gentle Shoulder Abduction
Next up is shoulder abduction, which means raising your arm out to your side. This is a critical motion for everyday things like reaching into a cabinet or putting on a shirt.
- Get into position: This time, turn your chair so you’re sitting sideways to the door. Your affected arm should be the one farther away. Grasp the handles with your palms facing in, toward each other.
- Start the movement: Just as before, your good arm (the one closer to the door) is in charge. Pull down on the rope, which will gently raise your affected arm out to the side.
- Find your goal: Move slowly until you feel a light stretch. Keep your elbow straight but not locked. Hold for a second before using your good arm to control the arm on its way back down.
Don’t lean your body away from the door to try and cheat the movement. Your spine should stay straight and tall. The motion needs to come from the shoulder joint itself. If you're struggling, try moving your chair a bit closer to the door.
There's a reason these pulley exercises are staples in rehab. In fact, over-the-door pulley exercisers have become a dominant tool, with adjustable models projected to make up 60% of a global market worth USD 0.5 billion by 2026. Their effectiveness is well-documented, especially for the shoulder, back, and knee issues we treat every day at MedAmerica Rehab Center. Studies have even shown that consistent use can lead to a 40% improvement in range of motion for frozen shoulder patients in just 4-6 weeks.
Incorporating Gentle Rotations
Finally, we’ll add internal and external rotation. These smaller movements are essential for daily tasks like tucking in a shirt or reaching for your seatbelt. Because they are a bit more advanced, only attempt them if you can do so without pain.
External Rotation: Sit sideways to the door with your affected arm closest to it. Bend that elbow to 90 degrees and keep it tucked right against your side. Use your good arm to pull the other handle away from the door, which will gently rotate your affected forearm outward.
Internal Rotation: Now, switch your position so your good arm is closest to the door. Again, bend your affected elbow to 90 degrees. Use your good arm to pull down, which will rotate your affected forearm inward toward your stomach.
These are subtle but powerful exercises. The absolute key here is to keep your elbow pinned to your side throughout the movement. For more guidance on this stage of recovery, many of our patients find our detailed guide on home exercises after rotator cuff surgery to be a really helpful resource.
While the pulley is fantastic for restoring motion, it's also smart to build supporting strength. Exercises that strengthen your back and improve posture, like those in a cable row exercise guide, can do wonders for your overall shoulder health and make your recovery even more effective.
Adapting Your Routine for Different Shoulder Conditions
Shoulder recovery is a personal journey, and what works for one person might not be right for the next. A cookie-cutter approach just doesn’t cut it. The way you use your over the door pulley exerciser has to be adjusted based on your specific injury, your pain levels, and where you are in the healing process.
At MedAmerica Rehab Center, we build exercise plans around the individual. I want to share that same thinking with you here, so you can adapt these core exercises for the most common shoulder issues. Always remember the golden rule: listen to your body. The goal is a gentle stretch, not sharp pain.
Modifications for Post-Surgical Recovery
Getting back on your feet after shoulder surgery, like a rotator cuff repair, is a marathon, not a sprint. In those first few weeks, your surgeon's protocol is the law. The main goal is protecting the surgical repair while gently reintroducing motion to keep stiffness from setting in.
This is where your pulley exerciser becomes an invaluable tool, because the focus is entirely on passive movement.
- Start Seated and Supported: Always begin your exercises sitting in a sturdy chair with good back support. This takes the pressure off your core and back, letting you focus only on your shoulder.
- Purely Passive Motion: Your recovering arm needs to be completely relaxed, like a wet noodle. Your healthy arm does all the work, pulling down on the other handle to lift the affected arm.
- Respect Your Limits: Only move within the pain-free range your surgeon or therapist has approved. At first, this might be a very small movement, and that’s perfectly okay. Pushing past this point can put the repair at risk.
Your pulley routine is just one piece of the puzzle. It’s crucial to create a safe home environment and understand pain management, especially when recovering from surgery at home.
Adjustments for Frozen Shoulder (Adhesive Capsulitis)
Frozen shoulder is a constant battle against stiffness. The joint capsule thickens up and gets incredibly tight, which can severely lock up your shoulder. With this condition, the pulley is your ally for gently and persistently challenging that stiffness.
The strategy here is to push right up to the edge of that stiff feeling, but never into sharp pain. You're aiming for a sustained, deep stretch.
A key technique I teach for frozen shoulder is the "hold and breathe" method. When you get to the end of your comfortable range, just hold it there for 15-30 seconds. While holding, take deep, slow breaths. This helps the muscles relax and often lets the stretch deepen just a tiny bit more.
Another trick is to add small, rhythmic pulses at the end of your range. Gently pull and release the rope just an inch or two. This creates a light "mobilization" that can sometimes be more effective at breaking up stiffness than a simple static hold.
Navigating Rotator Cuff Tendinitis
When you're dealing with rotator cuff tendinitis or bursitis, the goal is different. Here, we want to encourage healing by moving the shoulder through arcs of motion that don't cause pain. Inflammation is the problem, and being too aggressive will only make things worse.
Your focus should be on smooth, controlled movements inside a range that doesn’t flare up your symptoms.
- Shorten Your Arc: Don't even try for a full range of motion at first. Lift your arm only to the point right before you feel that familiar ache or pinch, then slowly bring it back down.
- Slow Everything Down: Perform each repetition deliberately and slowly, both on the way up and the way down. This reduces momentum and takes stress off those inflamed tendons.
- Modify Your Angle: Sometimes, just shifting your chair a few inches to change the angle of the pull can help you find a pain-free "lane" of movement. Experiment a little to see what feels best.
Exercise Modification Cheat Sheet
Think of this table as a quick reference guide for adapting the core pulley exercises to your specific situation.
| Condition | Modification for Flexion | Modification for Abduction | Key Precaution |
|---|---|---|---|
| Post-Surgery | Keep motion purely passive and within surgeon-prescribed limits. Your good arm does all the work. | Use only passive motion. The affected arm stays completely relaxed. | Never push into pain. Prioritize protecting the surgical repair above all else. |
| Frozen Shoulder | Use a "hold and breathe" technique at the end of your range for 15-30 seconds to encourage a deep stretch. | Try small, gentle pulses at the end of your range to slowly challenge the stiffness. | Avoid aggressive or ballistic movements. The goal is a persistent, gentle stretch. |
| Rotator Cuff Tendinitis | Work within a shorter, pain-free arc of motion. Do not push into the "pinch" zone. | Slow down the speed of each repetition to reduce stress on the inflamed tendons. | If an exercise consistently causes pain, stop. Rest and try again later with a smaller range. |
As you feel better, the next step is to gently progress the exercises. You can do this by moving from sitting to standing, which brings your core into play. You can also gradually add more repetitions or increase the time you hold a stretch. This systematic approach is exactly how we would guide you at MedAmerica Rehab, making sure your recovery is always moving forward safely.
Common Mistakes and Crucial Safety Precautions
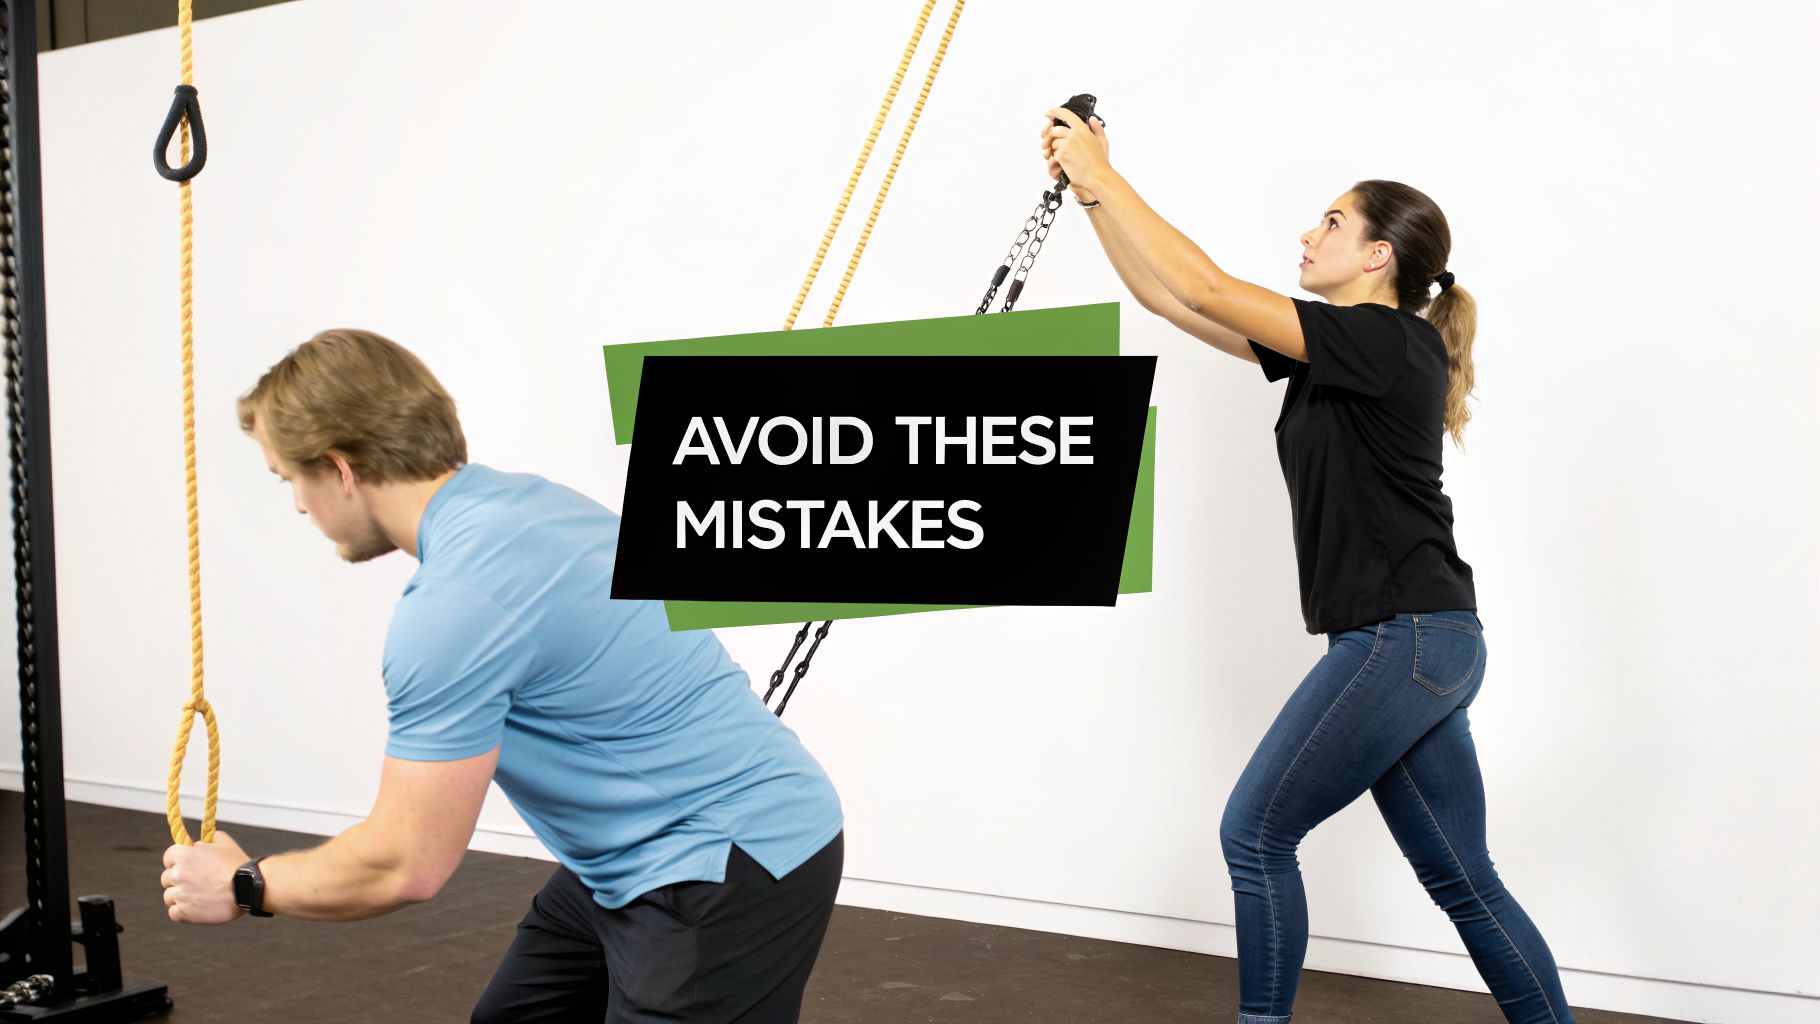
An over the door pulley exerciser can be a game-changer for shoulder recovery, but only when it’s used the right way. In our clinic, we often see patients making the same few mistakes that can unfortunately slow their progress or even cause a setback.
Getting the technique right from the very beginning is just as important as doing the exercises themselves. Think of this as your safety checklist to make sure every movement is helping, not hurting.
Mistake 1: Using Too Much Force
The single biggest error we see is treating the pulley like gym equipment. The goal here isn't to build muscle or yank your arm into position; it's all about gently reintroducing motion to the joint.
- What to Avoid: Forcefully pulling down on the rope, trying to hoist your sore arm as high as you can. This aggressive approach can easily irritate healing tissues and trigger inflammation.
- The Right Way: Use your healthy arm to apply slow, steady, and gentle pressure. The movement should feel like a controlled, easy lift, aiming for a mild stretch—never a painful strain.
Your recovering arm should be almost completely passive, especially in the early stages of rehab. Let your healthy arm do all the work, acting as the engine that guides the injured one through a safe range of motion.
Mistake 2: The Dreaded Shoulder Hike
"Shoulder hiking" happens when you unconsciously lift your shoulder blade up toward your ear as you raise your arm. This is your body’s natural way of cheating to get more height, but it completely defeats the purpose of the exercise.
When you hike your shoulder, you’re engaging the wrong muscles, like your upper trapezius and neck. This bypasses the very joint capsule and rotator cuff muscles we’re trying to gently mobilize.
Therapist Tip: Before you even start a set, stand in front of a mirror. Take a breath and consciously let your shoulders drop down and back. As you begin the pulley motion, keep your eyes on the recovering shoulder to make sure it stays down and relaxed. It's always quality over quantity here.
Mistake 3: Pushing Through Sharp Pain
There's a massive difference between the mild discomfort of a productive stretch and any kind of sharp, stabbing, or pinching pain. Your pulley exercises should always stay in that "gentle stretch" zone.
Sharp pain is your body’s alarm bell screaming at you to stop. Pushing through it is a fast track to re-injury or increased inflammation, which will only set your recovery back.
- Pain is a signal, not a challenge. If you feel a sharp sensation, immediately ease off the tension and shorten your range of motion.
- The "no pain, no gain" motto absolutely does not apply to shoulder rehab. A better mantra is "know pain, know gain." Listen to what your body is telling you.
Red Flags: When You Should Not Use a Pulley
A pulley system is a fantastic tool, but it's not right for every situation. You should not use a pulley without first getting cleared by a professional if you are experiencing:
- Acute Inflammation: If your shoulder is noticeably red, swollen, and warm to the touch, any movement could make the inflammation worse. Rest is your priority.
- Shoulder Instability: If your shoulder feels like it's "slipping," "popping out," or might dislocate, a pulley could easily worsen the instability.
- A Recent, Undiagnosed Injury: Never start a pulley routine after a new fall or injury without getting a proper diagnosis. You need to know what you're dealing with first.
These situations require a professional evaluation from a physical therapist or doctor. Using a pulley at the wrong time can turn a minor issue into a major one. Your therapist is the best person to determine if and when this tool is a safe and effective part of your recovery plan.
When Your Shoulder Needs Professional Physical Therapy
An over the door pulley exerciser can be a fantastic tool for your home recovery, but it's important to know its place. It's a device to help you keep moving, not a replacement for the hands-on guidance of a physical therapist.
While consistent, gentle movement at home is a huge part of healing, there are times when doing it on your own isn't enough—or could even make things worse. Knowing when to pause and call in a professional is the key to a safe and successful recovery.
Signs It's Time to See a Professional
Your body is pretty good at telling you when something is wrong. Listening to those signals can prevent a small issue from becoming a chronic problem. If you experience any of the following, it’s time to stop the pulley exercises and schedule an evaluation.
- Pain That Gets Worse or Spreads: Gentle pulley work should lead to a gradual decrease in pain. If your pain gets sharper, more intense, or starts traveling down your arm or into your neck, that’s a red flag.
- A Sudden Drop in Motion: If you wake up one day and can barely move your arm, or you feel a new "block" that wasn't there before, something has changed. This needs a proper diagnosis.
- Feelings of Instability: Any sense that your shoulder might "slip," "pop out," or give way is a major warning sign. Pulleys are not the right tool for an unstable joint and could do more harm than good.
- Numbness or Tingling: If you notice new or lasting numbness, tingling, or weakness in your arm or hand, it could point to nerve involvement. This requires an immediate professional assessment.
- No Improvement After a Few Weeks: If you’ve been diligent with your pulley routine for two to three weeks and see zero change in your pain or mobility, it's a clear signal that the exercises aren't addressing the root cause.
Think of it this way: your pulley is a compass, but a physical therapist is the mapmaker. The compass can point you in the right direction, but the mapmaker understands the terrain, knows the shortcuts, and can guide you around obstacles you can't see.
What a Physical Therapist Offers Beyond the Pulley
When you come to MedAmerica Rehab Center, our goal is to build a complete picture of your condition, not just hand you a list of exercises. We dig into the "why" behind your pain to create a plan that delivers lasting results.
This personalized approach often includes powerful treatments you simply can't do on your own at home.
- Hands-On Manual Therapy: This is where a therapist uses skilled, hands-on techniques to release tight tissues, break down scar tissue, and gently guide the joint back into its proper movement pattern.
- Advanced Therapeutic Modalities: We might use tools like electrical stimulation to calm pain and muscle spasms or advanced shockwave therapy to jumpstart healing in chronic tendon injuries.
- Personalized Exercise Prescription: A therapist doesn't just show you what to do—we show you how to do it perfectly. We correct your form in real-time, making sure you are challenging the right muscles without putting your shoulder at risk.
Seeing a physical therapist for the first time can feel intimidating, but it doesn't have to be. To get a better sense of the process, you can read our guide that explains what a typical physical therapy session looks like.
Taking Control of Your Recovery
Using a home pulley exerciser shows you're taking an active role in your healing journey, and that's a great first step. But the smartest thing you can do is recognize when it’s time to bring in an expert.
Don't let a plateau or lingering uncertainty turn into a long-term problem. An expert evaluation provides clarity, safety, and the most efficient path back to moving and feeling your best.