Rehabilitation for Shoulder Impingement: A Clear, Evidence-Backed Recovery Guide
That sharp, pinching pain when you lift your arm overhead is a tell-tale sign of shoulder impingement. It’s one of the most common reasons people come to our clinic for shoulder pain, and the good news is, it almost always gets better with the right plan.
A solid rehabilitation for shoulder impingement isn't about just resting. It's an active process of calming down the irritated tissues, restoring your shoulder's natural movement, and building up the muscles that support it. This non-surgical approach works wonders—in fact, about 60% of patients find lasting relief within two years by committing to a smart physical therapy program.
Understanding Your Shoulder Impingement Recovery Plan
If you’re dealing with that nagging ache at the front or top of your shoulder, you know how frustrating it can be. That feeling comes from the tendons of your rotator cuff getting pinched in a tight spot called the subacromial space. Think of it like a rope repeatedly rubbing against a sharp edge. Over time, that friction causes inflammation and pain.
Shoulder impingement usually creeps up on you. It’s not from a single event but the result of little things adding up over months or years.
What Causes This Pinching?
We often see a few common culprits behind that pinching sensation:
- Repetitive Overhead Activities: Think of painters, swimmers, or even just reaching into high cabinets day after day.
- Poor Posture: Slouching at a desk is a big one. It causes the shoulders to roll forward, which shrinks the space for those important tendons.
- Muscle Imbalances: When some shoulder muscles are too weak and others are too tight, it throws off the whole system. The shoulder joint can’t move smoothly, leading to impingement.
The journey from pain back to full function follows a clear, logical path. It moves from figuring out the problem to actively fixing it.
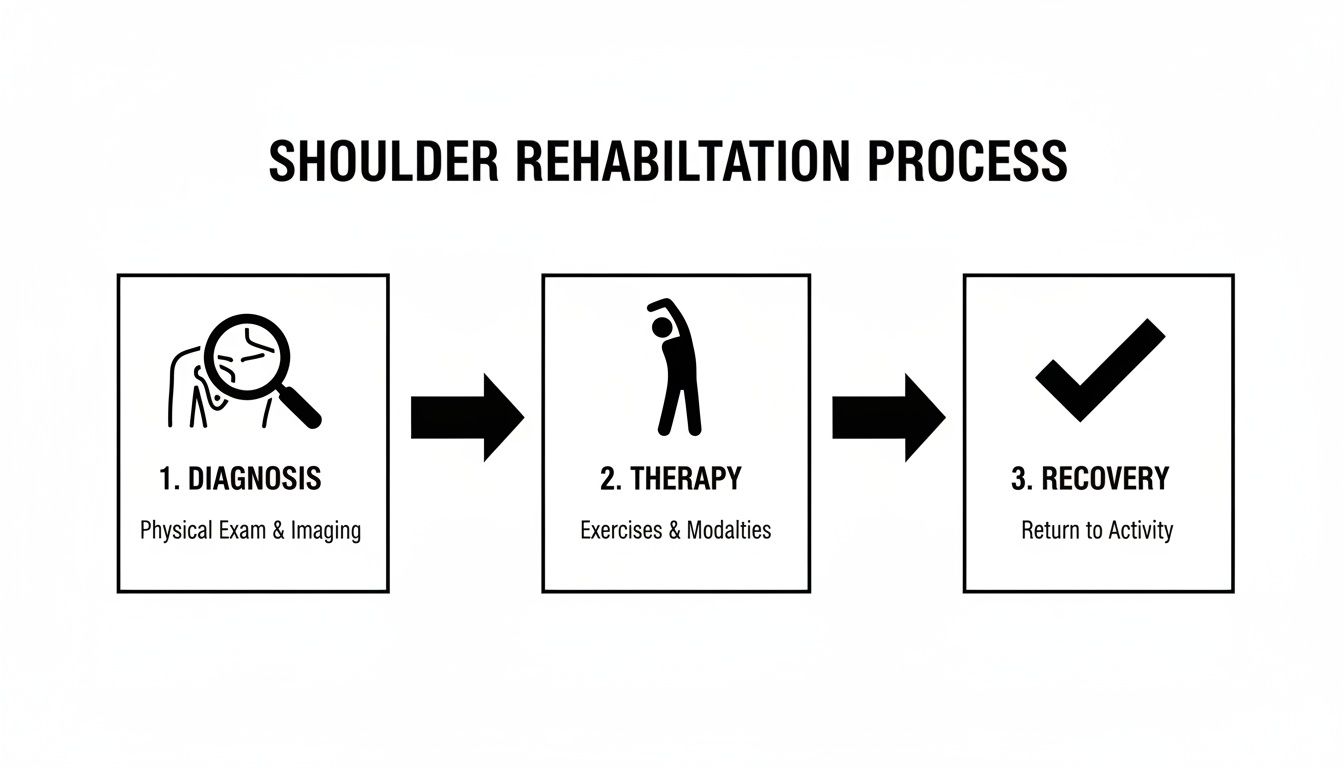
As you can see, it's a structured process. You can't just jump to the strengthening phase; you have to calm the shoulder down first.
Shoulder Impingement Rehab At a Glance
To give you a clearer picture, here’s a quick breakdown of what a typical rehab plan looks like. We move through these phases based on how your shoulder is responding, not on a rigid timeline.
| Rehab Phase | Primary Goal | Example Activities |
|---|---|---|
| Phase 1: Pain & Inflammation Control | Calm the irritated tissues and reduce pain. | Pendulum swings, gentle range of motion, ice/heat. |
| Phase 2: Mobility & Activation | Restore normal joint movement and wake up key muscles. | Wall slides, sleeper stretch, isometric rotator cuff exercises. |
| Phase 3: Strengthening | Build strength and endurance in the shoulder and back muscles. | Banded external rotation, rows, scapular retraction exercises. |
| Phase 4: Return to Activity | Re-introduce functional and sport-specific movements. | Light overhead pressing, sport-specific drills, plyometrics. |
Each phase builds on the last, creating a shoulder that is not only pain-free but also stronger and more resilient than before.
Your Path to a Pain-Free Shoulder
The great news is that a structured, non-surgical plan is the gold standard for treating impingement. It systematically tackles the root causes—the "why" behind your pain—not just the symptoms.
Our approach is grounded in evidence-based physical therapy. This means every exercise and technique we use is backed by solid research to give you the most effective path to recovery.
The goal is to get you back to a point where your shoulder is not just free of pain, but also resilient enough to prevent the problem from coming back. This is critical because shoulder pain is incredibly common, with a median community prevalence of 16%. Without the right care, symptoms can linger for years. That’s why a dedicated 3-to-6-month program focused on rotator cuff and scapular strength is so vital for a successful outcome. You can learn more about the research behind these long-term recovery statistics.
This guide is designed to walk you through that proven path, giving you a clear, realistic plan for getting back to the activities you love without that dreaded pinch.
Managing Pain and Inflammation in the Early Stages

Before you can start rebuilding a stronger shoulder, you have to calm the storm inside. That sharp, pinching feeling is a signal that your joint is irritated, and the first step in any good rehabilitation for shoulder impingement is to reduce that pain and inflammation. This isn't about sitting on the couch for weeks. It’s about being smart.
We call this phase active rest or relative rest. It simply means you need to identify—and stop doing—the specific things that make your shoulder bark at you. This breaks the cycle of irritation and gives the tissues a real chance to heal.
Modify Your Daily Activities
Small changes to your daily habits can have a massive impact on your shoulder pain. The goal is to avoid any motion or position that closes down the space in your shoulder joint. Pay attention to those little "pinchy" moments throughout your day.
Here are a few practical adjustments you can try right away:
- Change Your Sleeping Position: Stop sleeping on your painful shoulder. If you sleep on your back, place a small pillow under your elbow to support the arm. If you’re a side sleeper, lie on your good side and hug a pillow. Both of these tricks stop your shoulder from rolling forward and getting pinched all night long.
- Fix Your Workspace: Adjust your chair so your elbows are bent at a comfortable 90-degree angle. Scoot your keyboard and mouse closer to you. Reaching forward is a classic trigger for shoulder impingement.
- Rethink Lifting and Reaching: Use a step stool to get things from high shelves instead of reaching overhead. When you lift something, hold it close to your body and drive with your legs. Don’t let your shoulders do all the work.
These simple adjustments reduce the daily micro-trauma that keeps the inflammation going.
Using Cold Therapy and Gentle Motion
Along with changing your habits, two simple tools are your best friends in this early phase: ice and gentle movement. This duo helps control the swelling while keeping your joint from getting stiff and locked up.
An ice pack applied for 15-20 minutes a few times a day can work wonders for pain and swelling. The cold helps constrict blood vessels, which numbs the ache and calms down those inflamed tendons. Always remember to wrap the pack in a thin towel to protect your skin.
At the same time, you need to introduce some gentle, pain-free motion. This isn't about stretching or strengthening—not yet. It’s just about moving the joint without causing that pinch. The classic pendulum swing is perfect for this.
How to Perform a Pendulum Swing
- Find a sturdy table or countertop and lean forward, supporting yourself with your good arm.
- Let your painful arm hang straight down toward the floor. Try to relax it completely.
- Now, use your body to create a gentle swing—forward and back, side to side, and in small circles.
- The key is that the movement should come from your hips and torso, not from firing your shoulder muscles. Your arm should feel like a heavy, dead weight.
This gentle motion creates a little traction, which can help open up the joint space and provide some relief. Do these for about a minute at a time, several times a day. If you want more details on icing strategies, you can check out our guide on using an ice pack in physical therapy.
Getting these early steps right is your first big win on the road to recovery.
Restoring Your Shoulder's Natural Movement
Once that initial, sharp pain finally starts to back off, it’s tempting to jump right back into your old routine. But this is where patience really pays off. The next step is to gently reintroduce movement and start reclaiming your shoulder’s natural range of motion.
It’s a common mistake to push too hard, too soon, and end up right back where you started. The real goal here isn’t just to stretch what’s tight; it’s about reteaching the entire shoulder how to move correctly and without that dreaded pinch. This is a critical phase in any successful rehabilitation for shoulder impingement.
Focus on Mobility, Not Pain
You have to learn the difference between a good, productive stretch and the warning signal of pain. A good stretch often feels like a deep pull or tension, but it should never feel sharp, stabbing, or like the familiar pinching ache of your impingement.
If you feel that "bad" pain, listen to your body and back off immediately. Either make the movement smaller or find a different angle. Trying to force your way through it will only annoy the very tissues you’ve been working so hard to calm down.
A core principle we teach every patient at MedAmerica Rehab Center is to move into tightness but away from pain. It’s a simple rule, but it’s the key to making steady progress without causing a flare-up.
Essential Stretches for Shoulder Mobility
A couple of classic stretches are fantastic for creating more space inside the shoulder joint. Try to hold each one for a full 30 seconds and aim to complete them 2-3 times during your session.
The Doorway Pectoral Stretch:
Your chest muscles can get incredibly tight from daily life—especially from sitting at a desk—which pulls your shoulders forward and makes impingement worse. This stretch is the perfect antidote.
- Stand in an open doorway and bend your elbows to 90 degrees, resting your forearms on the frame.
- Take a small step forward with one foot until you feel a gentle stretch across your chest and the front of your shoulders.
- Hold it right there and breathe. Make sure you aren't arching your lower back.
The Sleeper Stretch:
This one is a game-changer for the back of your shoulder. It targets the posterior capsule, a spot that gets notoriously tight and messes with your shoulder's mechanics.
- Lie down on your sore side, with that arm stretched out in front of you. Bend the elbow to 90 degrees so your fingers point to the ceiling.
- With your other hand, gently push your forearm down toward the floor.
- Stop as soon as you feel a stretch in the back of your shoulder. Don't force it past that point.
Some people find these movements are easier with a little help. For example, learning about how an over-the-door pulley exerciser can help you safely get your motion back can be a great option.
Waking Up Your Shoulder Blade
Getting your full mobility back isn't just about the ball-and-socket joint. Your shoulder blade (scapula) is a huge player in healthy shoulder function. In most impingement cases I see, the scapula just isn't moving right—it fails to get out of the way when you lift your arm overhead.
We need to retrain it to glide and rotate properly. These aren't heavy lifting exercises; they're all about control and waking up the right muscles.
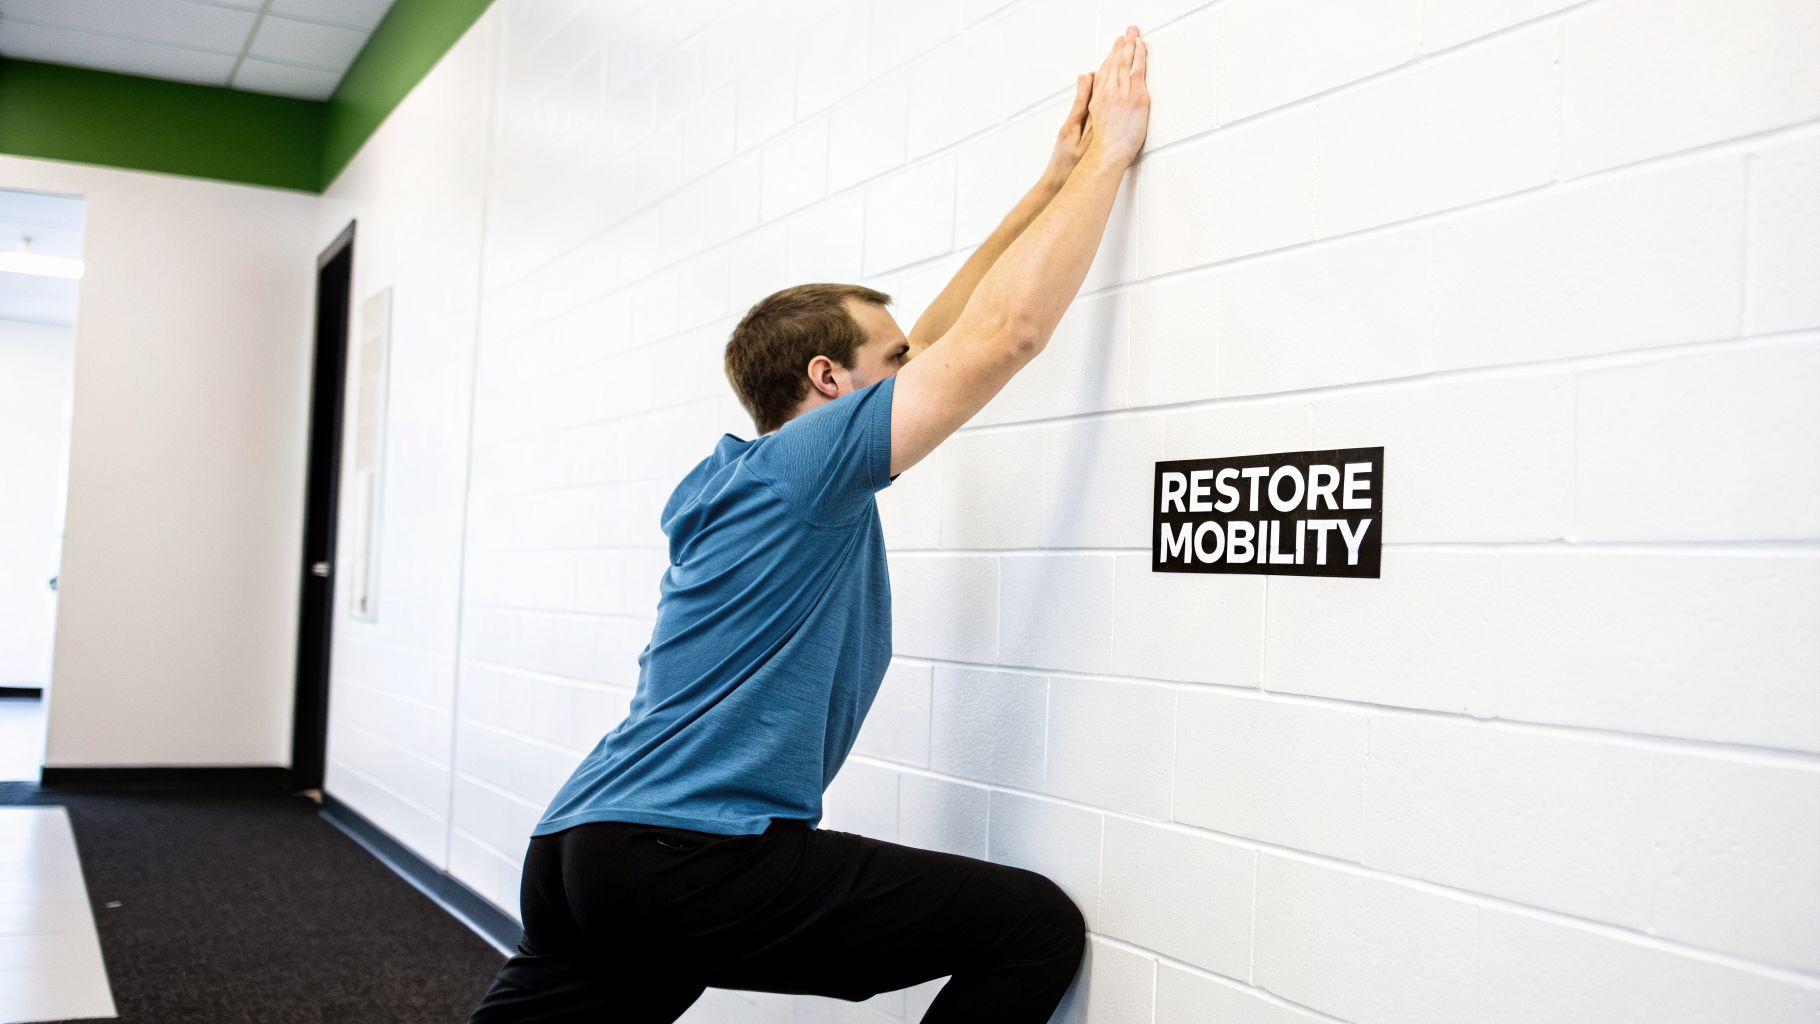
Wall Slides:
This is one of my favorites for teaching the scapula how to rotate upward as you raise your arm—a key piece of pain-free reaching.
- Stand facing a wall with your forearms pressed against it, elbows bent.
- Slowly slide your arms up the wall. Think about your shoulder blades moving up and out.
- Go only as high as you can without pain, then slowly slide back down to the start.
Scapular Squeezes:
This simple move is perfect for activating the postural muscles between your shoulder blades.
- Whether you're sitting or standing, get tall.
- Gently squeeze your shoulder blades together, like you're trying to hold a pencil between them.
- Hold that squeeze for 5 seconds, then relax completely.
Mastering these basic mobility and activation drills builds the solid foundation you'll need for the next phase: building a stronger, more resilient shoulder.
Building a Stronger, More Resilient Shoulder
You’ve managed to quiet down that initial, sharp pain and are starting to get some movement back. That's a huge step. Now, we enter the most critical phase for making sure this problem doesn't come back: building strength.
This is where we turn a painful, fragile shoulder into a stable and powerful joint that can handle daily life. The goal isn’t to become a bodybuilder. Instead, it’s about waking up and reinforcing the small, specific muscles that keep the shoulder joint moving smoothly. Your consistency here is what truly creates lasting change.
The Muscles That Matter Most
Think of your shoulder as a team. For it to work right, two key muscle groups have to do their jobs perfectly: the rotator cuff and the scapular stabilizers. When these guys get weak or lazy, the whole system breaks down, creating the exact pinching motion that causes impingement.
The rotator cuff is a set of four small muscles that wrap around the top of your arm bone, holding the "ball" securely in the "socket." If they're not strong enough, the ball can slide upward and pinch the tendons above it. Sound familiar?
Your scapular stabilizers are the muscles that control your shoulder blade. They anchor it to your rib cage and make sure it glides correctly as your arm moves. When the shoulder blade moves properly, it creates just enough space for you to lift your arm overhead without that painful pinch.
Essential Strengthening Exercises
Alright, let's get to work. The whole point of these exercises is to hit those target muscles with precision. Focus on perfect, controlled form—it’s far more important than how much weight or resistance you use. We are retraining movement patterns, not just building bulk.
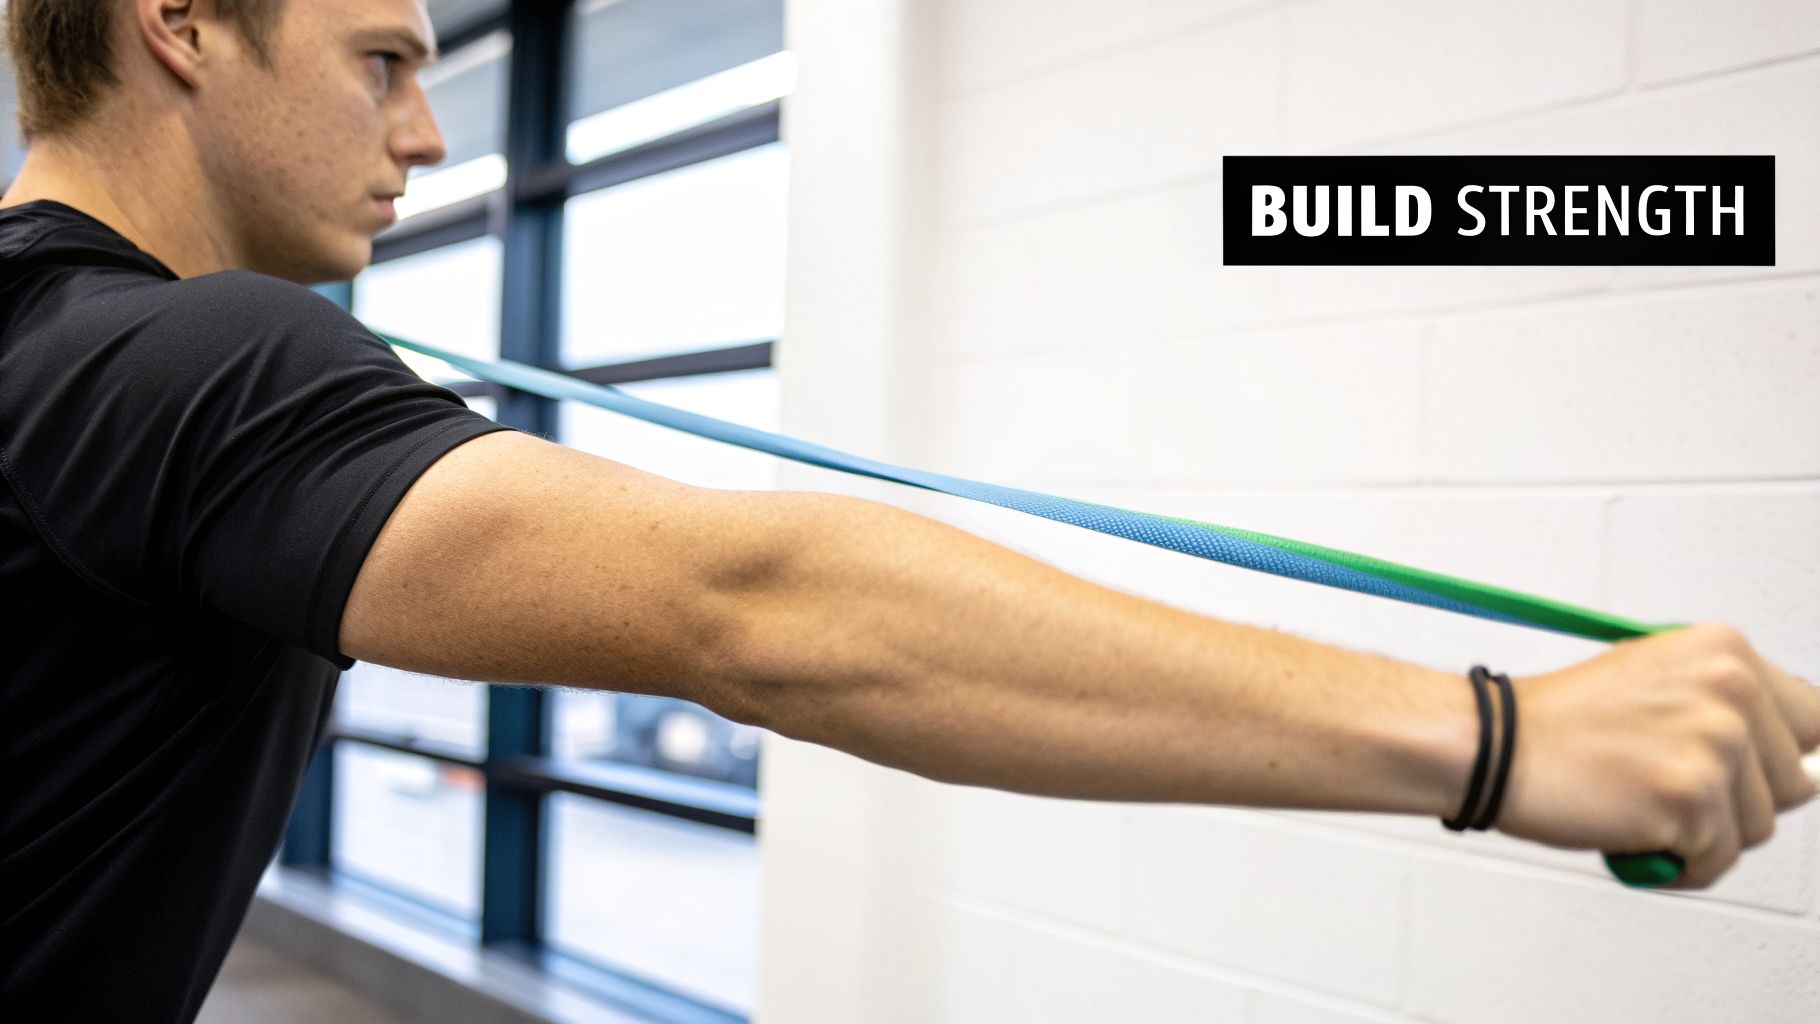
A good set of resistance bands will be your best tool for this. They offer a steady, low-impact tension that’s ideal for these movements.
- Banded External Rotation: This is the absolute cornerstone for strengthening the back of the rotator cuff. Stand with your elbow tucked into your ribs, bent at a 90-degree angle. Holding a band, slowly pull your hand outward, rotating the shoulder while keeping that elbow pinned to your side.
- Scapular Rows (Band Pull-Aparts): A fantastic move for those scapular stabilizers. Hold a resistance band with both hands, arms straight out in front of you. Without bending your elbows, squeeze your shoulder blades together to pull the band apart.
- Isometric Internal Rotation: Stand next to a wall or doorframe. Place the palm of your hand against it with your elbow at your side, bent to 90 degrees. Gently press your hand into the wall as if you're trying to rotate your arm toward your belly. Hold the contraction for 5-10 seconds without any actual movement.
As you feel yourself getting stronger, you have to find ways to make the exercises more challenging. This is a core principle of rehab called progressive overload, and it's how you build real, functional strength.
Progressive overload doesn’t just mean grabbing a heavier band. You can also increase the challenge by adding a few more reps, doing an extra set, or simply slowing the movement down to make your muscles work harder for longer.
Research Backs Up This Approach
Focusing on these muscle groups isn't just a good idea we came up with; it's backed by solid science. A major systematic review confirmed that a structured exercise plan is a highly effective treatment for shoulder impingement. The study showed that patients who committed to strengthening their rotator cuff and scapular muscles saw significant drops in pain and major gains in range of motion and overall function. You can see for yourself how structured exercise programs improve shoulder function in the research.
This evidence is precisely why our approach at MedAmerica Rehab Center is so focused on targeted, progressive exercises. These same movements are also crucial for post-surgical recovery, which we cover in our guide on effective home exercises after rotator cuff surgery.
The strength you build now is your insurance policy against future pain. It will support your shoulder through every lift, reach, and throw for years, letting you get back to the things you love with confidence.
Putting Your New Strength to Work in the Real World
Once you’ve built a solid foundation of strength in your shoulder, the real work begins. It’s one thing to do your exercises, but it’s another to translate that strength into reaching for a cup on the top shelf without that familiar twinge of pain.
This next phase is all about retraining your brain and your body to work together again. We’re moving beyond simple, isolated exercises and teaching your shoulder how to handle complex, everyday movements with control, coordination, and confidence.
From Simple Exercises to Smart Movement
The goal here is to reintroduce the very movements that used to cause you pain, but this time with a sharp focus on good form. Think of it as "auditing" your old, unhelpful habits and replacing them with safer, stronger patterns. The strength you've been building is what makes this possible.
Here’s how you can start bridging that gap:
- Practice Reaching Overhead: Start with no weight at all. Stand in front of a mirror and slowly raise your arm. Pay close attention to your shoulder. Does it try to creep up toward your ear? If it does, consciously pull it down and back as you lift. You want to feel those muscles around your shoulder blade doing their job.
- Simulate Daily Lifting: Grab something light, like a can of soup or a water bottle. Practice lifting it from a countertop and placing it on a higher shelf. The key is to keep your core engaged and your shoulder blade stable. Avoid any sharp or pinching sensations.
- Reintroduce Rotational Moves: If you’re an athlete, this is where you start slow-motion rehearsals. A golfer might practice a swing without a club; a tennis player might mimic a forehand. The focus isn't on power—it's 100% on the quality of the movement and making it feel smooth.
It’s completely normal to feel a little hesitant during this process. Your body has a memory of the pain, and you have to prove to it, slowly and deliberately, that these movements are safe again.
When Your Home Program Needs a Helping Hand
A consistent home exercise plan is the cornerstone of recovery, but sometimes you hit a wall. If you’re dealing with stubborn pain, nagging stiffness, or just feel “stuck” in your progress, it’s a clear sign that it’s time for some professional support. At MedAmerica Rehab Center, we pair your home routine with advanced, in-clinic treatments designed to get you over these hurdles.
Manual Therapy: There’s only so much stretching can do on its own. A skilled therapist can use hands-on techniques to gently mobilize your shoulder joint and the surrounding soft tissues, restoring movement and relieving stiffness in a way you just can’t do yourself.
Acupuncture or Dry Needling: If you have persistent, nagging trigger points, these techniques can be a game-changer. By targeting those specific knots, we can release muscle tension, improve local blood flow, and give you enough pain relief to make your strengthening exercises far more effective.
Extracorporeal Shockwave Therapy (ESWT): For more chronic, stubborn cases—especially those involving calcific tendinopathy—shockwave therapy is a powerful, non-invasive tool. It uses targeted acoustic waves to wake up tissues that are stuck in a cycle of chronic inflammation and kickstart a true healing response.
Combining your dedicated home program with professional, in-clinic care is often the fastest route to recovery. This ensures you’re not just getting stronger, but you’re also fixing the specific movement faults that led to the impingement in the first place.
Before surgery is even on the table, a proper non-operative rehabilitation for shoulder impingement program is typically given 3 to 6 months to work. And the research backs this up. Studies consistently show that combining supervised therapy with a consistent home exercise plan leads to major improvements. For example, researchers often see significant benefits at both the 5-week and 12-week marks in these structured programs.
This data confirms that a patient, well-guided approach works. You can read more about these clinical rehabilitation timelines to see how this integrated strategy helps people achieve a more complete and lasting return to their favorite activities.
Of course. Here is the rewritten section, designed to match the specified human-written style and tone.
Your Shoulder Impingement Rehab Questions, Answered
As you start to recover, you’re going to have questions. That’s a good thing. Understanding your body and the plan to fix it is a huge part of successful rehabilitation for shoulder impingement. We hear a lot of the same questions from patients in our clinic, so we’ve answered the big ones right here.
How Long Until I Can Get Back to My Sport?
This is the number one question we get from athletes, whether they're into golf, tennis, or lifting. The honest answer? It’s different for everyone. There’s no magic date on the calendar when you're suddenly cleared for action.
Getting back to your sport is a process, not a switch you just flip on. Once we’ve settled the pain down and you’ve built solid strength in your rotator cuff and shoulder blade muscles, we can start adding back sport-specific movements. But we have to be smart about it to prevent a flare-up.
For instance:
- A swimmer might start with short, slow drills, focusing only on perfect form without adding any power.
- A CrossFitter could practice overhead movements with a light PVC pipe, just to get the pattern right without the load.
- A golfer would likely start with putting and chipping before ever thinking about a full swing.
The goal is to test the waters, not to make waves. We're looking for smooth, clean movement with zero pain. A full return to your sport, without restrictions, typically takes anywhere from 3 to 6 months. This can change based on how demanding your sport is and how consistent you are with your rehab exercises.
Is a Cortisone Shot a Good Idea?
Cortisone shots can be a really helpful part of the plan, but you have to know what they're for. A cortisone shot isn't a cure—it's a powerful anti-inflammatory. Its job is to knock down severe pain and swelling, and it does it fast.
This can create a valuable "window of opportunity." By dialing your pain way down, the shot makes it possible to do your physical therapy exercises effectively. If your pain was so bad you couldn't even start the strengthening work, a shot can break that cycle.
But, if we don't fix the things that caused the impingement in the first place—like bad posture, weak muscles, or poor movement habits—the pain is almost guaranteed to come back when the shot wears off. We see it as a booster for your therapy, not a replacement. It's a decision you should always make with your doctor and therapist.
Why Did My Shoulder Start Hurting for No Reason?
We hear this one all the time. People get frustrated because they can’t point to one specific moment when they got hurt. The reality is, shoulder impingement almost never comes from a single injury.
It’s an overuse issue that builds over time. The pain might feel like it came out of nowhere, but the stress on your shoulder has likely been adding up for months, or even years. The real culprits are often the small, repetitive things you do every day.
Think about these common scenarios:
- Slouching over a computer all day, which forces your shoulders to roll forward and closes down that space in your joint.
- Repetitive overhead jobs, like painting a room or stocking shelves at work.
- Hidden muscle imbalances you never knew you had, which mess up the smooth rhythm of your shoulder.
The pain is just your body’s final warning signal that the tissues can't take the load anymore. That’s why getting a thorough evaluation is so critical—we have to find and fix those hidden causes.
What Red Flags Should I Watch For During Rehab?
You need to know the difference between the "good" soreness of a muscle getting stronger and a "bad" pain that's a warning sign. Feeling some muscle fatigue or a mild, dull ache in the area you’re working is totally normal.
But there are certain types of pain you should never push through. These are red flags. They mean you need to stop what you're doing and check in with your physical therapist.
Be on high alert for:
- Sharp, stabbing, or pinching pain while doing an exercise.
- Pain that gets much worse at night and keeps waking you up.
- A sudden loss of strength, where you feel like you can’t lift your arm anymore.
- A feeling that your shoulder is "giving way" or unstable.
- Any new or worsening numbness or tingling running down your arm.
If you feel any of these, it could mean something more serious is going on, or that we just need to adjust your program. Learning to listen to your body is one of the most important parts of your recovery.
Navigating rehabilitation for shoulder impingement can feel overwhelming, but you don't have to guess your way through it. If you're dealing with stubborn pain or feel like you've hit a wall, our expert team at MedAmerica Rehab Center is ready to help. We use hands-on therapy and create a personalized exercise plan that targets the real cause of your pain to get you back to doing what you love. Visit us at https://www.medamericarehab.com to book your same-day appointment and start your journey to a pain-free shoulder.