
ACL Reconstruction Recovery Timeline: A Phase-by-Phase Guide
Fewer than half of recreational athletes return to their pre-injury performance within 12 months after ACL reconstruction, according to pooled outcome data summarized in the British Journal of Sports Medicine. That's why a successful operation doesn't automatically mean a successful return to sport. The knee may feel comfortable during walking and stairs while the graft, quadriceps, landing control, and confidence remain unprepared for cutting, jumping, and contact.
A practical ACL reconstruction recovery timeline usually extends across 9 to 12 months, although some accelerated protocols target 6 months. The calendar matters because graft biology needs time, but it can't clear you for sport by itself. Progress should be earned through restored extension, controlled swelling, strength symmetry, hop performance, and psychological readiness.
What the ACL Reconstruction Recovery Timeline Actually Looks Like
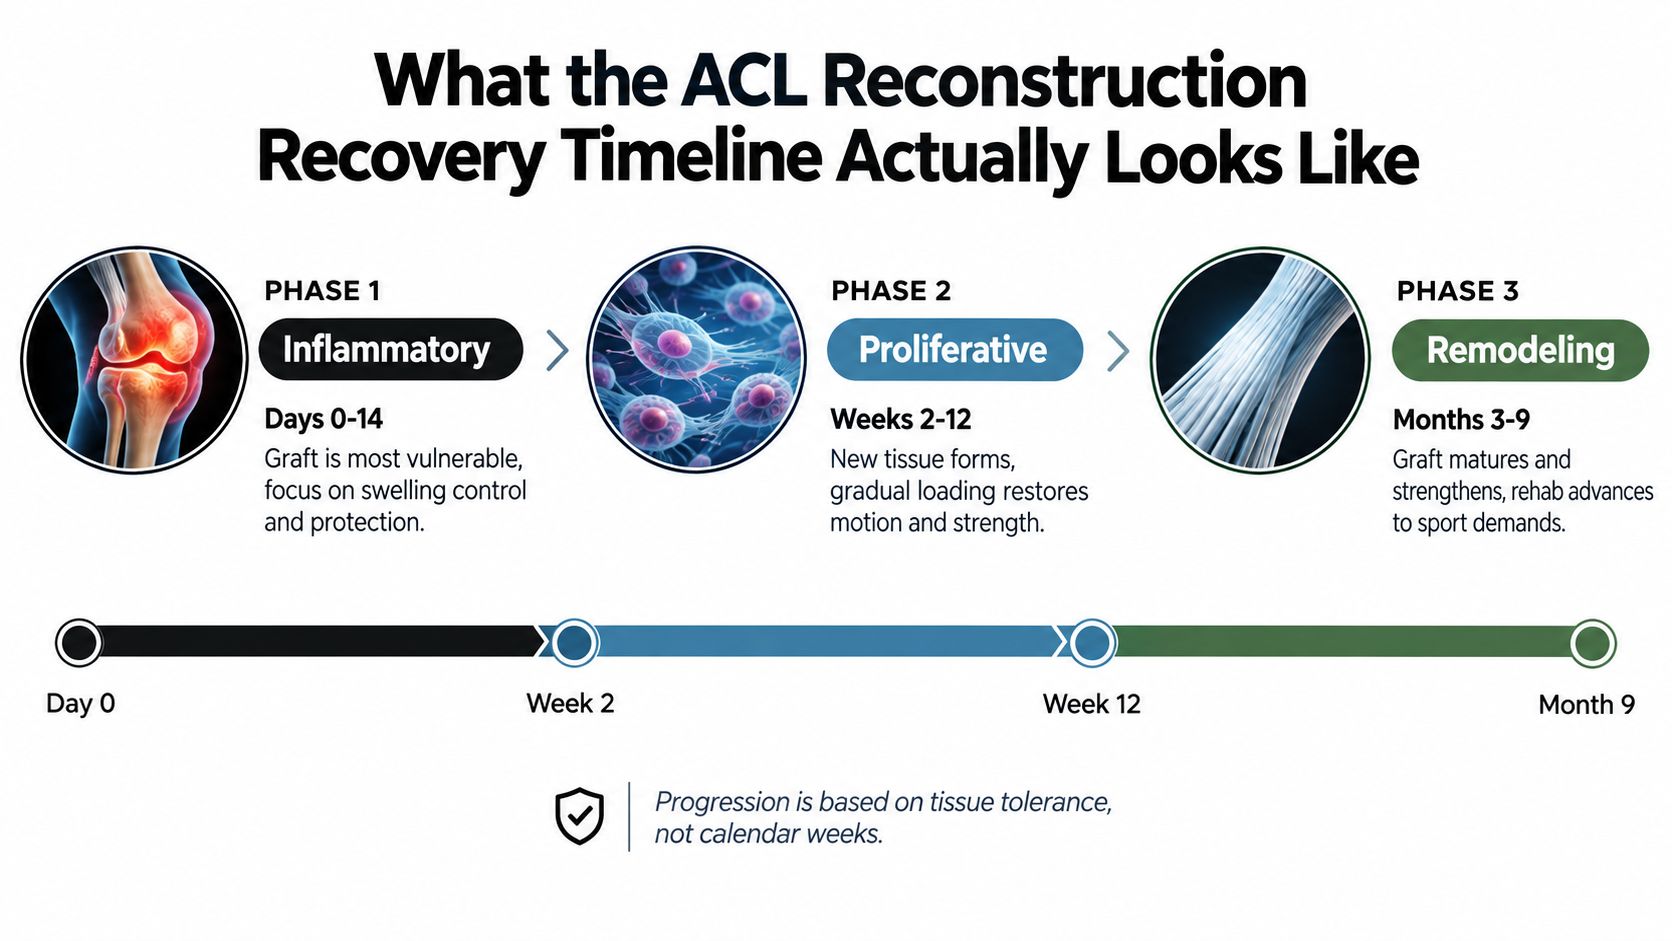
ACL rehabilitation follows the graft's changing biology. After reconstruction, the graft passes through inflammatory, proliferative, and remodeling stages. It undergoes necrosis, revascularization, and tissue remodeling over roughly a 12-month period, particularly when an allograft is used, as described in this clinical review of ACL reconstruction recovery.
That biology explains why the program changes over time. Early treatment protects fixation and restores motion. Middle-stage rehabilitation builds strength while the graft remains biologically vulnerable. Later work exposes the knee to acceleration, deceleration, hopping, cutting, and the unpredictable demands of sport.
Five phases, not one return date
The phases below provide a practical framework:
- 0 to 2 weeks: Protect the reconstruction, reduce swelling, regain full extension, and restore quadriceps activation.
- 2 to 6 weeks: Recover functional flexion, normalize walking, and introduce controlled loading.
- 2 to 4 months: Rebuild strength, single-leg control, and movement quality before considering running.
- 4 to 9 months: Progress plyometrics, agility, sprinting, and sport-specific tasks.
- 9 to 12 months and beyond: Complete objective testing and return gradually to unrestricted sport when readiness is demonstrated.
The progression gates are more important than the dates. I look for extension symmetry, a measurable quadriceps strength index, a single-leg hop-test battery, and an ACL-RSI score that reflects confidence and psychological readiness. The 2025 systematic review and network meta-analysis identified psychological readiness measured by ACL-RSI as the most critical determinant of successful return to sport, with physical testing adding more limited predictive value (Journal of Sports Sciences review).
Clinical rule: The calendar is a floor for tissue healing, not a finish line for athletic readiness.
The First Two Weeks After Surgery
The first two weeks aren't about proving how much exercise you can tolerate. They're about restoring the conditions that let the knee move, contract, and heal without unnecessary irritation.
Your early priorities
Aim for full passive knee extension during the first week, unless your surgeon has given different instructions. Place the heel on a rolled towel or firm cushion so the knee can gently straighten without forcing it. Don't rest with a pillow directly behind the knee, because prolonged flexion can make extension harder to regain.
Control swelling with elevation, prescribed compression, and cryotherapy. You can use an ice pack for physical therapy recovery as directed, protecting the skin and following your surgical team's instructions. If swelling remains tense and doesn't improve with rest and elevation, contact the clinic rather than adding more exercise.
Use this simple home sequence, adjusted to your surgeon's protocol:
- Ankle pumps: Perform frequent sets throughout the day to keep the ankle moving and support circulation.
- Quad sets: Tighten the thigh and press the back of the knee gently toward the bed. Hold briefly, relax fully, and repeat several times in a session.
- Heel slides: Slide the heel toward the body for comfortable flexion, then return to a relaxed straight position. Don't trade extension for aggressive bending.
- Patellar mobilization: If your clinician has cleared it, gently move the kneecap in the instructed directions to limit stiffness.
- Straight-leg raises: Add these once you can contract the quadriceps without an extension lag. If the knee drops into flexion during the lift, return to quad sets and ask for guidance.
Crutches protect the graft and help you develop a clean gait. Progress weight-bearing only as permitted, especially if a meniscus or cartilage procedure was performed. Your target is a controlled step, not merely abandoning the crutches on a particular day.
What the biology demands
The graft is protected by its fixation while the surrounding tissues are inflamed. Excessive shear, twisting, or poorly controlled walking can irritate the knee during this vulnerable window. Extension, swelling control, and quadriceps activation therefore take priority over chasing a large flexion number.
Suture removal commonly occurs around day 10 to 14, depending on the surgical plan. Pain should gradually become more manageable, but escalating pain, calf symptoms, drainage, fever, or swelling that doesn't settle with rest deserves prompt medical advice.
Weeks Two to Six Restoring Range of Motion
By the second week, rehabilitation shifts from basic protection toward rebuilding a usable knee. The priorities remain full extension, improving flexion, normalizing gait, and reactivating the quadriceps without creating an effusion that lasts into the next day.
Build motion without creating a new problem
A practical flexion target is about 120 degrees by week 6, provided your surgeon's restrictions allow it. Extension still comes first. Patients sometimes force bending because it feels like the obvious measure of progress, then walk with a bent knee because terminal extension remains limited. That compensation can become difficult to correct.
Progressive exercise may include electrical stimulation for a quiet quadriceps, controlled open-chain knee extension within the safe arc prescribed by your clinician, mini squats, a limited-range leg press, and stationary cycling once motion permits. Add hip strengthening and carefully dosed hamstring curls to support the knee without provoking swelling.
Balance should move from double-leg standing to supported single-leg stance. Keep the quality high. A knee that collapses inward, a pelvis that drops, or a trunk that shifts away from the surgical side signals that the task is too difficult or needs closer supervision.
| Week | ROM Target | Key Exercises | Advance When… |
|---|---|---|---|
| 2 | Full extension, comfortable early flexion | Heel slides, patellar mobility, quad sets, ankle pumps | Swelling is controlled and the quadriceps can contract |
| 3 to 4 | Steady flexion gains with extension maintained | Mini squats, supported balance, hip work, cycling when cleared | Walking becomes smoother without an extension lag |
| 5 to 6 | Functional flexion, with approximately 120 degrees as a practical target | Leg press within range, controlled hamstring curls, single-leg balance | Extension is symmetric, flexion is functional, and loading doesn't create next-day effusion |
For additional movement options, use the range of motion exercises for knee rehabilitation only within the limits of your own protocol. The progression out of this phase depends on a voluntary quadriceps contraction without extension lag, symmetric extension, functional flexion, and a gait pattern that doesn't rely on protective compensation.
Months Two to Four Rebuilding Strength and Control
Many recoveries either gain momentum or stall. Daily life may feel much easier, but the operated leg still needs repeated, progressive loading to rebuild force production and control.
Strength is the main assignment
Begin with bilateral squats and leg press work, then gradually shift volume toward single-leg tasks. Step-ups, split squats, controlled step-downs, and single-leg leg press variations reveal whether the surgical side can manage load without the hip shifting or the knee moving inward.
Hamstring work deserves deliberate attention. Use hip-dominant patterns, bridges, controlled curls, and later Nordic variations when appropriate. Add calf raises, lateral hip strengthening, trunk control, and balance work on compliant surfaces or perturbation platforms as your therapist judges suitable.
The graft is still undergoing ligamentization and remodeling. Progressive loading is necessary, but uncontrolled pivoting is not. The aim isn't to keep the knee inactive. It's to expose it to increasing force in a predictable way, then monitor how it responds.
The running decision
Running may be introduced around four months in some protocols, but the date is only one part of the decision. Before running, I want to see:
- Full knee extension
- No meaningful effusion
- A pain-free, normalized walk
- Quadriceps symmetry approaching roughly 70 percent, measured against the opposite side
- Controlled single-leg loading without obvious valgus, pelvic drop, or protective trunk movement
Begin with short intervals on a predictable surface. Increase one variable at a time, such as duration, speed, or frequency. A knee that swells later that day or the following morning hasn't accepted the current dose, even if the run itself felt easy.
The common errors are predictable. Some patients skip eccentric hamstring work, rush into jumping because jogging feels comfortable, or perform too little single-leg volume to correct the side-to-side deficit. Strength work should have a physiologic purpose, not just fill time in the gym. Heavy controlled loading builds force, eccentric work improves braking, and single-leg tasks expose the movement strategies sport will demand.
Months Four to Nine Advanced Training and Return to Sport
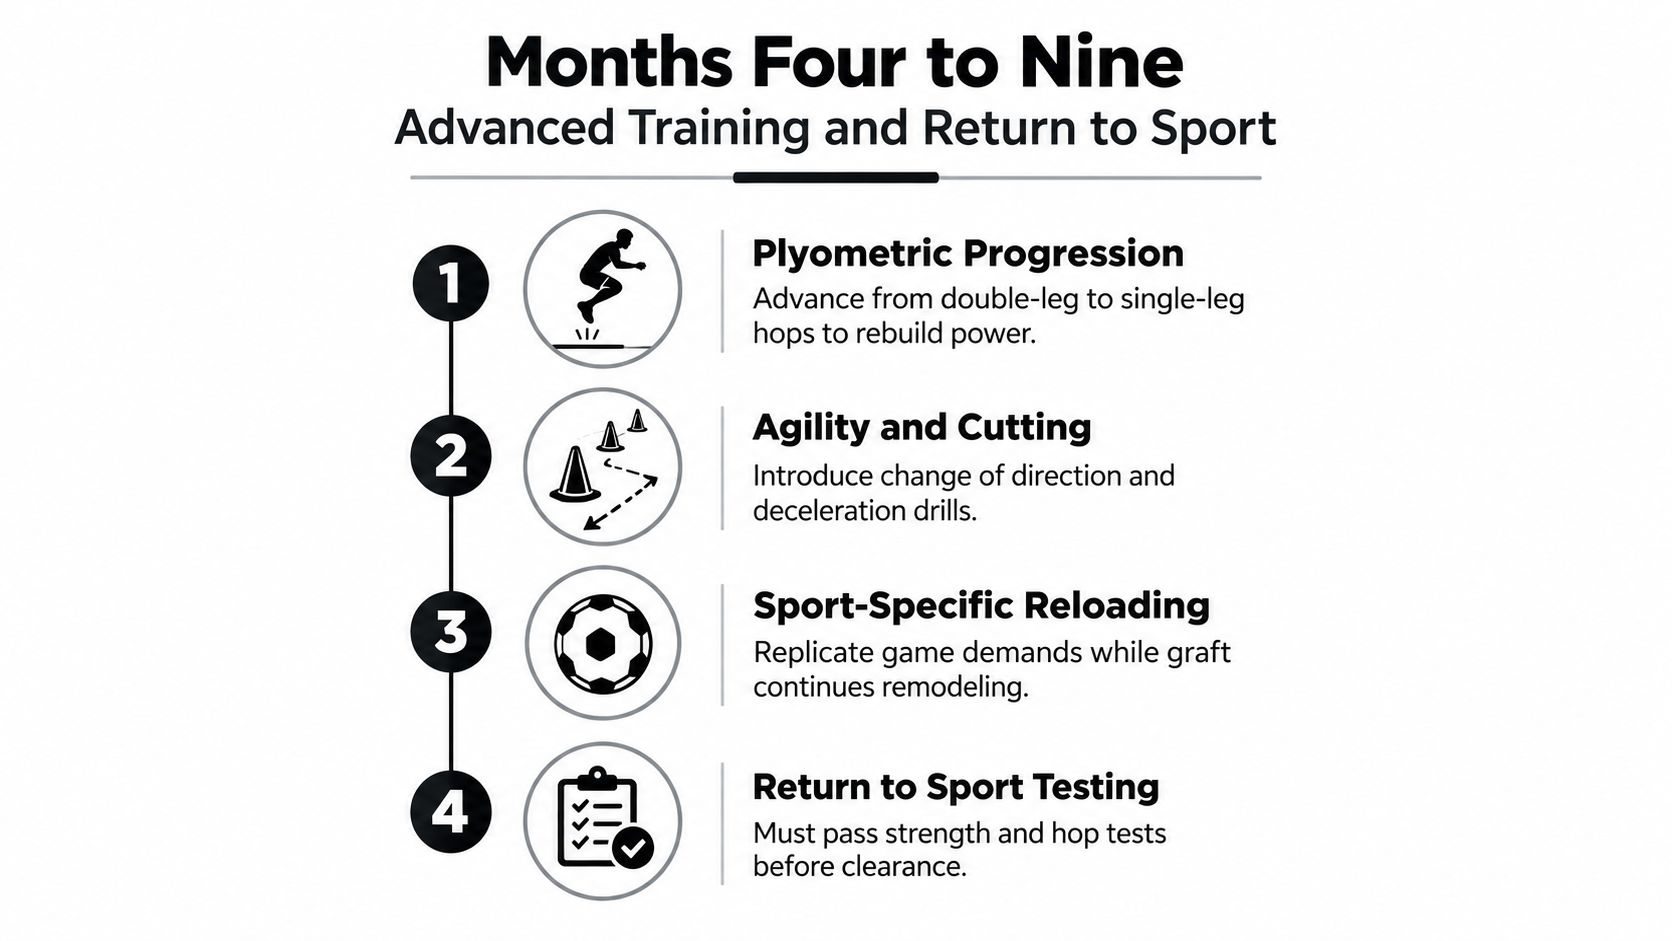
The advanced phase is where rehabilitation starts to resemble sport, but resemblance isn't readiness. The graft continues remodeling, and the knee must demonstrate that it can absorb and produce force repeatedly under speed, fatigue, and changing direction.
Progress the demands in layers
Start plyometrics with controlled double-leg landings. Progress to alternating contacts, single-leg hops, lateral work, and repeated efforts only when the knee remains quiet. Teach the athlete to land with the hip and knee flexed, the trunk controlled, and the knee aligned over the foot.
Linear running comes before multidirectional sprinting. Deceleration follows acceleration. Change-of-direction drills begin at controlled speeds and gradually approach the angles, distances, and decision demands of the athlete's sport. Contact, reactive play, and stick-handling or ball work belong near the end of the sequence, not at the beginning.
Before unrestricted clearance, the battery should include:
- Quadriceps and hamstring limb symmetry above 90 percent
- Hop-test battery symmetry above 90 percent
- An ACL-RSI score above 60
- Successful sport-specific field testing
- No instability, meaningful effusion, or movement-quality breakdown
These thresholds should be interpreted by a qualified clinician, not treated as isolated pass-or-fail numbers. A strong hop result with poor landing mechanics, or good strength with pronounced fear, still calls for more preparation.
The British Journal of Sports Medicine evidence on delayed return to sport reports that reinjury risk drops by 51 percent for each month return to sport is delayed until month 9. In the Delaware-Oslo cohort, 38.2 percent of athletes who failed return-to-sport criteria were reinjured, compared with 5.6 percent who passed; level I athletes also had a 30 percent reinjury rate in the first two years versus 8 percent in lower-level sports.
A return-to-play guide such as return-to-play rehabilitation planning can help organize the testing conversation, but clearance still needs to reflect the individual knee, graft, sport, and surgical details. Athletes recovering from other lower-limb injuries can also benefit from Swift Running injury recovery tips, especially when rebuilding running volume and learning how to respond to load.
Red Flags and Signs You Are Pushing Too Fast
“Pain-free” doesn't mean “ready.” Walking and stairs often normalize before the knee can handle repeated landing, high-speed deceleration, or an unexpected pivot. A patient can feel excellent at 6 months and still lack the strength, movement control, graft maturity, or psychological readiness required for sport.
Use symptoms as decision rules
Treat the following responses as information about the training dose:
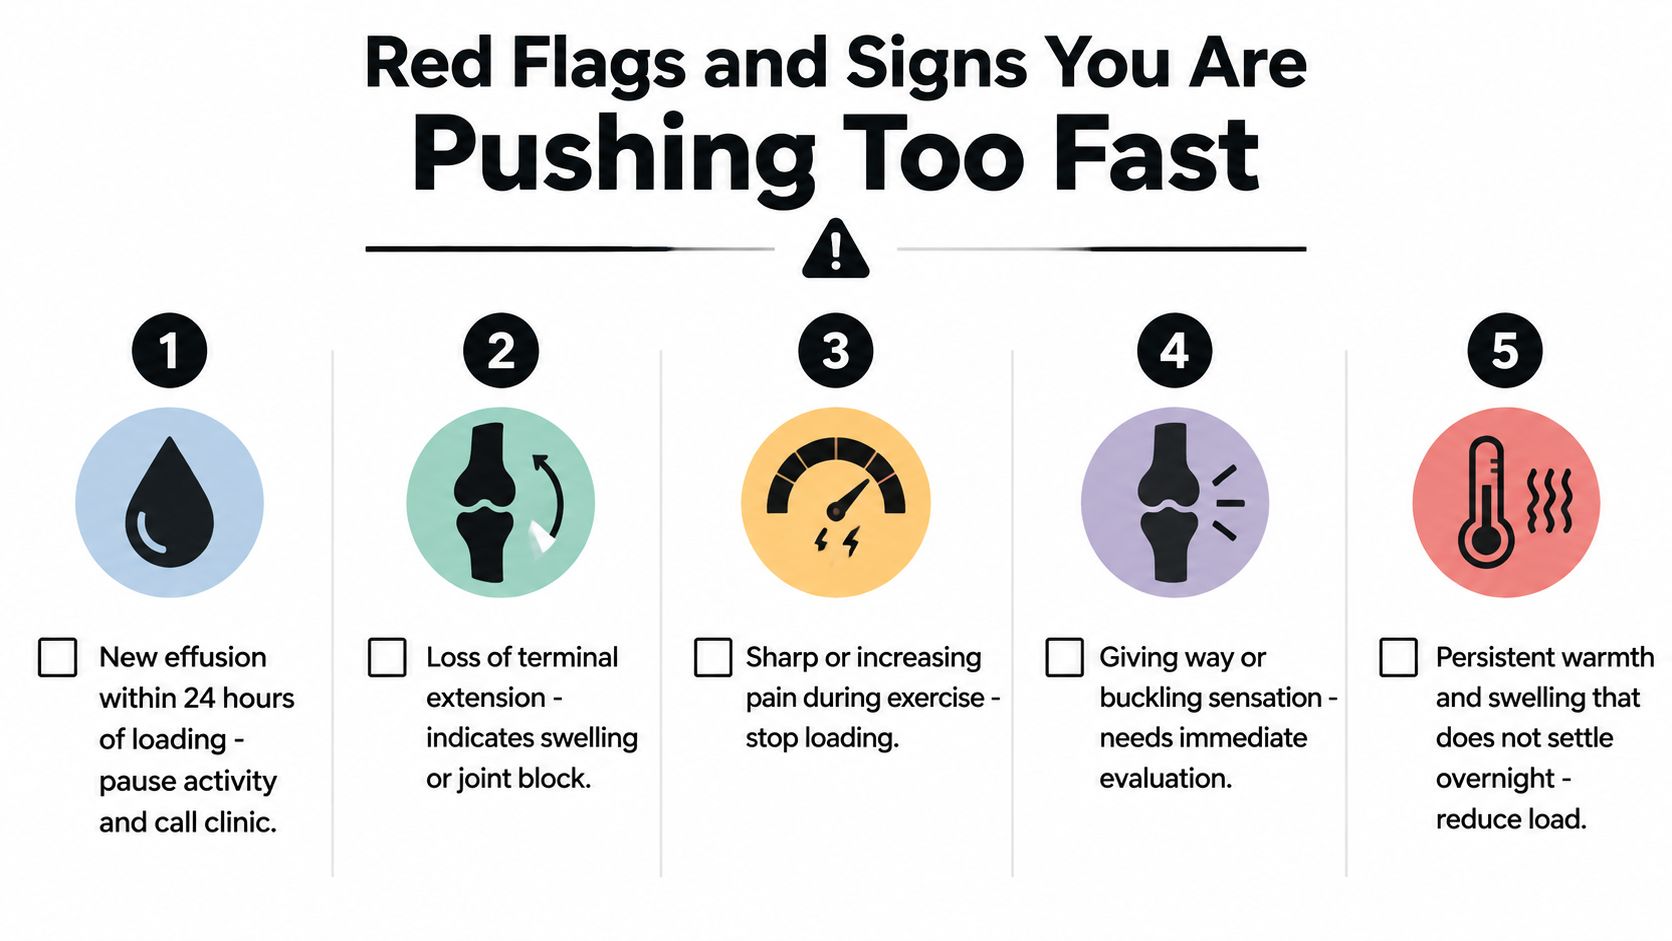
- New effusion within 24 hours of loading: Pause the aggravating activity and contact your clinic for advice.
- Loss of terminal extension beyond 5 degrees: Reduce the load and arrange a clinical review, especially if extension had already been restored.
- Giving way or buckling during single-leg work: Stop the task and seek prompt evaluation rather than testing the knee repeatedly.
- Night pain unrelated to position: Contact the clinical team if it persists or is unexplained.
- Strength symmetry that stalls over 4 weeks: Review exercise selection, loading, technique, recovery, and possible joint irritation with your therapist.
Persistent warmth and swelling that doesn't settle overnight also warrants reducing the training load. Sharp or increasing pain during an exercise is a reason to stop that exercise, not a challenge to push through.
Match the response to the risk
A mild, short-lived increase in soreness after a planned progression may call for a load-adjustment conversation. Effusion that repeatedly appears after training deserves a same-week review. Instability, a sudden loss of motion, or an unexplained pain spike should be assessed promptly.
The broader outcome data explain why this caution matters. A nationwide study found that at a mean of 2.3 years after ACL reconstruction, 62 percent returned to participation, 50 percent returned to sport, and only 17 percent returned to preinjury performance, with 16 percent sustaining a new ACL injury in a related clinical cohort (2025 return-to-sport review). The knee's comfort at a checkpoint isn't the same as its capacity under competition demands.
How MedAmerica Supports Each Phase of Recovery
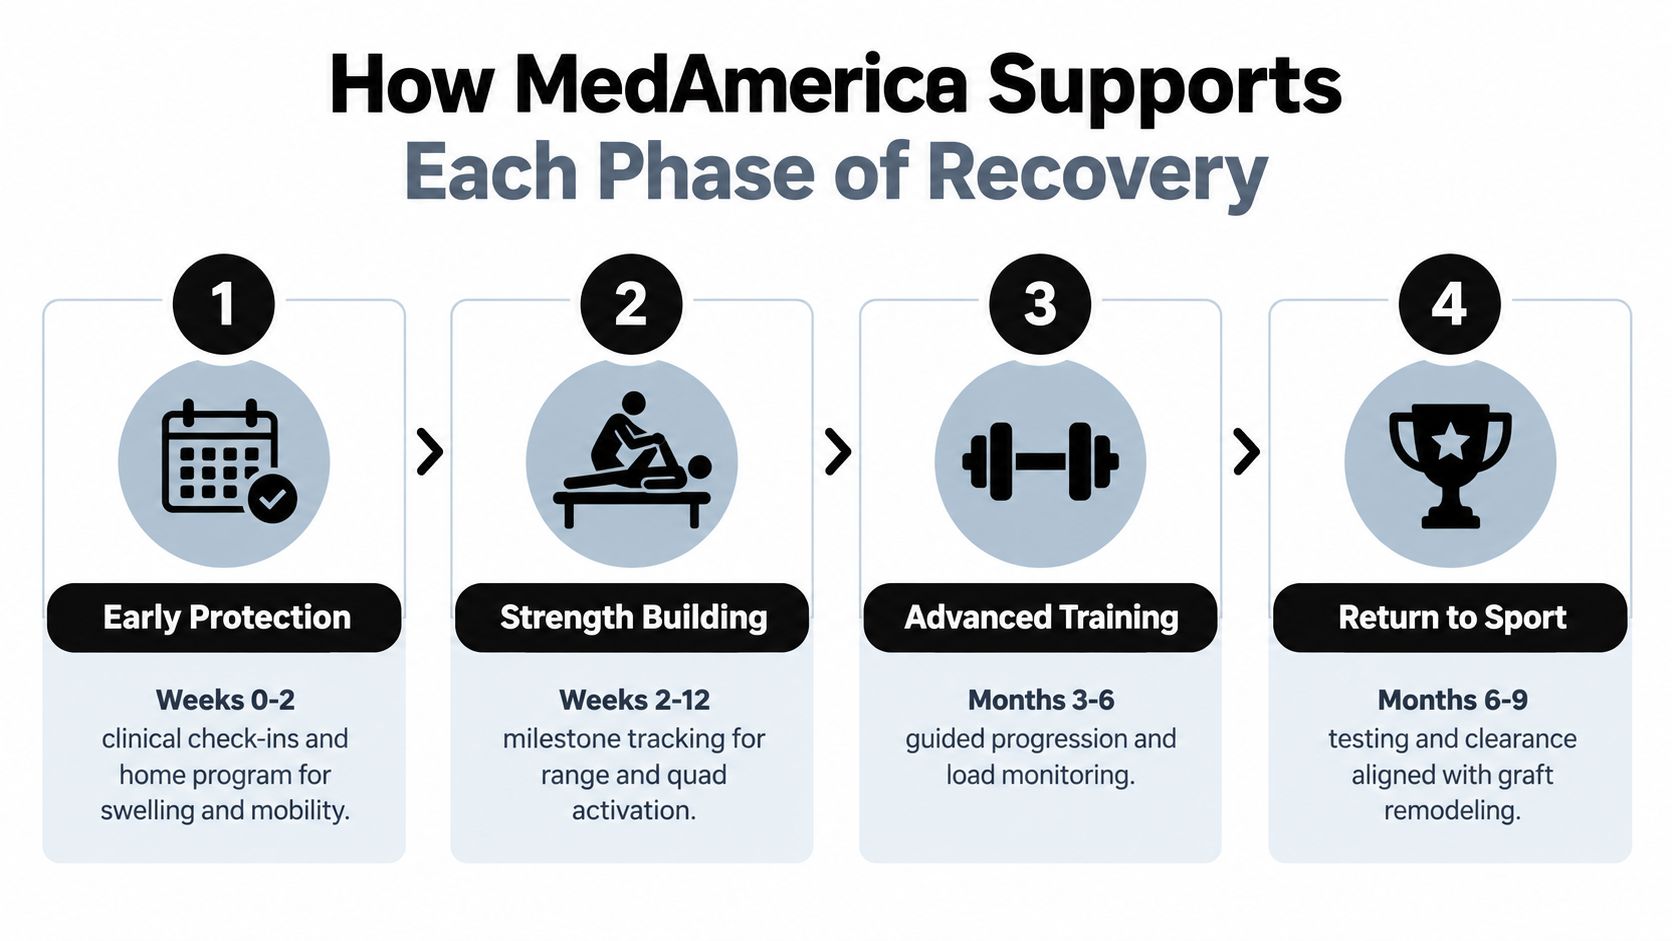
A useful rehabilitation program connects every exercise to a clinical decision. The early plan protects motion and reduces irritation. The middle plan measures strength and control. The later plan tests whether the athlete can tolerate sport demands without relying on confidence alone.
Support across the healing stages
During weeks 0 to 2, clinicians can coordinate surgeon restrictions, swelling management, extension work, gait training, and a home program. The patient needs clear instructions about exercise technique, crutch use, wound concerns, and the symptoms that should prompt a call.
During weeks 2 to 6, supervised care focuses on extension, flexion, quadriceps recruitment, walking mechanics, and the transition to controlled closed-chain loading. The therapist can adjust the dose when a knee responds with effusion rather than strictly following a printed calendar.
From months 2 to 4, milestone tracking becomes central. Strength progressions, single-leg control, hamstring and hip loading, balance, and running readiness should be documented. The patient should know exactly why running is being delayed or introduced.
Between months 4 and 9, testing should include quadriceps and hamstring symmetry, a hop-test battery, movement quality, sport-specific field work, and ACL-RSI assessment. Persistent effusion, loss of extension, or unexplained pain spikes should trigger an escalation pathway rather than an automatic progression.
A good protocol doesn't just tell you what to do next. It tells you what result must appear before you do it.
Practical questions patients ask
When can I drive? There isn't one safe date for everyone. The answer depends on the operated side, vehicle, medication use, brake control, and your surgeon's instructions.
How much swelling is expected? Some swelling can fluctuate as activity increases. Swelling that repeatedly appears within 24 hours of loading or fails to settle with rest should be reported.
What should I do after a setback? Don't abandon the entire program. Remove the aggravating demand, return to the last well-tolerated level, and ask your clinician whether the response reflects excessive volume, poor technique, or a joint problem.
When is running safe? Running is appropriate only after the knee has restored extension, walking is pain-free, effusion is controlled, and strength and single-leg control meet your clinician's criteria.
How can I choose supportive equipment? If you're comparing options for postoperative support, this guide can help you compare knee braces for ACL surgery, but a brace shouldn't replace progressive rehabilitation or an individualized surgical protocol.
MedAmerica Rehab Center can provide post-surgical physical therapy with individualized exercise progression, milestone tracking, gait and balance work, and return-to-activity planning. Contact the clinic to discuss your surgery and current phase, then visit MedAmerica Rehab Center to arrange an evaluation and build a criteria-based recovery plan.
MedAmerica Rehab · Deerfield Beach
Talk to a clinician about your pain
Physical therapy, chiropractic, acupuncture and shockwave therapy under one roof, since 1995. Same-day appointments are available.
Mon–Thu 8:00 AM – 6:30 PM · Fri 8:00 AM – 3:00 PM