How to Heal a Rotator Cuff Injury Without Surgery: A 2026 Guide
When you feel that first sharp twinge in your shoulder, it’s easy to think the worst. But can you really heal a rotator cuff injury without surgery?
For most people, the answer is a resounding yes.
A structured, non-surgical plan is incredibly effective for many rotator cuff injuries. It’s not just wishful thinking; the evidence is solid. A major review of multiple studies found that conservative treatments, like physical therapy and a smart home exercise plan, have a success rate of around 75%. That means three out of four people get back to their lives without ever seeing an operating room.
The key is taking the right steps from the very beginning. What you do in the first few days can set the stage for a smooth and successful recovery.
Your First Steps After a Rotator Cuff Injury

Before diving into a full-blown rehab program, there are a few things you can do immediately to calm things down and give your body a head start on healing. Think of this as first aid for your shoulder.
For a quick overview, this table outlines the most important immediate actions you can take at home.
Immediate Self-Care for Rotator Cuff Pain
| Action | What to Do | Why It Helps |
|---|---|---|
| Relative Rest | Avoid painful movements like reaching overhead or lifting heavy objects. Don't stop moving completely. | Gives the injured tissue a break without causing the whole shoulder to get stiff and weak. |
| Ice Therapy | Apply a cold pack for 15-20 minutes, several times a day. Wrap it in a thin towel to protect your skin. | Reduces inflammation and provides temporary pain relief by numbing the area. |
| Activity Modification | Adjust daily habits. Sleep on your back or uninjured side; dress your injured arm first. | Minimizes constant, low-level strain on the rotator cuff throughout the day. |
Let's break down exactly what these steps look like in your daily life.
Find Your “Relative Rest” Sweet Spot
The old advice was to stop moving entirely. We now know that’s a recipe for a stiff, weak shoulder. The modern approach is relative rest, which is all about being smarter, not stationary.
Think of it as putting up a “do not disturb” sign for your shoulder tendon. If reaching into a high cabinet causes a sharp pain, move those items to a lower shelf for a while. If your golf swing is the problem, maybe stick to the putting green for a couple of weeks.
The goal is simple: listen to your body. Avoid any activity that brings on a sharp, stabbing pain or makes that dull ache noticeably worse.
Key Takeaway: Relative rest means finding pain-free ways to live your life. You're giving the injured tissue a chance to calm down without letting your entire shoulder seize up from disuse.
Calm Down Pain and Inflammation
In those first few days after an injury or a bad flare-up, your top priority is getting the pain and swelling under control. This makes you more comfortable, but it also creates a better environment for healing to actually begin.
One of the best tools here is good old-fashioned ice. Grab a gel pack or a bag of frozen peas, wrap it in a thin towel, and place it on the most painful spot for 15 to 20 minutes at a time. Doing this a few times a day can help dial down the inflammation and take the sharp edge off the pain. For more detailed instructions, our guide on using an ice pack in physical therapy is a great resource.
Make Small Changes to Your Daily Routine
You’d be surprised how much relief you can get from a few simple tweaks to your daily habits. These small changes reduce the constant, low-level strain that keeps your rotator cuff irritated.
- Adjust Your Sleep: Try not to sleep directly on the painful shoulder. Sleeping on your back is ideal, or you can lie on your good side with a pillow propped under your injured arm for support.
- Get Dressed Smarter: When putting on a shirt, guide your injured arm into the sleeve first. When taking it off, pull your healthy arm out first. This simple trick minimizes painful overhead movements.
- Lift and Carry Carefully: Keep objects close to your body. Use your uninjured arm to carry heavier things like groceries, your purse, or a backpack.
These immediate actions—rest, ice, and smart modifications—are the foundation of your recovery. They don't magically fix the injury, but they create the perfect conditions for the targeted exercises and therapies to come.
Before we can talk about healing your shoulder, we need to get a clear picture of what’s actually going on inside. When you understand the 'what' and 'why' behind your shoulder pain, your recovery stops being a guessing game and starts being a smart, targeted plan.
The rotator cuff isn’t a single muscle. It's really a team of four muscles and their tendons that wrap around the ball of your upper arm bone (the humerus). Think of it like a cuff on a shirt sleeve, holding the arm bone snugly in your shoulder socket. This team—the supraspinatus, infraspinatus, teres minor, and subscapularis—is what allows you to lift your arm, reach behind you, and rotate.
What Kind of Injury Do I Have?
Pain and weakness start when one or more of these tendons get damaged. Knowing the type of injury is key because it guides our entire approach to getting you better. Most rotator cuff issues fall into a few common categories.
- Tendinitis: This is basically an irritated and inflamed tendon, often from simple overuse. It usually feels like a nagging, dull ache that gets worse when you lift your arm. Imagine a rope that's getting frayed from constant rubbing—it’s angry, but not broken.
- Impingement: This is a pinching problem. The tendon gets squeezed between the bones in your shoulder, causing a sharp, catching pain when you raise your arm overhead or out to the side. It's like getting your sleeve snagged in a closing door.
- Tendon Tear: This means there's a physical split in the tendon fibers. A partial tear is like a rip in fabric that doesn’t go all the way through. A full-thickness tear, on the other hand, means the tendon has torn completely away from the bone.
A torn rotator cuff often comes with a deep, aching pain that gets much worse at night, especially when you try to lie on that shoulder. This specific night pain is a classic sign we hear about all the time.
When You Need a Professional Diagnosis
While it's good to understand the possibilities, trying to diagnose yourself can be a risky game. A proper diagnosis from a physical therapist or doctor is the only way to build a recovery plan that is both safe and truly effective. Pushing through the wrong exercises can make things much worse.
Some symptoms are more than just a minor tweak and are your body's way of telling you to get professional help right away. We call these red flags.
Key Red Flags to Watch For
Please don't ignore these signs. Getting an expert opinion when you notice them is one of the most important steps you can take.
- A Sudden, Traumatic Injury: If your pain started with a specific event, like a fall, a car accident, or trying to lift something way too heavy, it needs to be looked at.
- Inability to Lift Your Arm: If you physically can't raise your arm on your own—what we call a "drop arm sign"—this can signal a significant tear that needs immediate attention.
- Severe and Worsening Pain: Pain that is sharp, constant, and not getting any better with a few days of rest is a clear sign to see a pro.
- Noticeable Weakness: If you feel a sudden, major difference in strength—making it hard to do simple things like comb your hair or reach for your seatbelt—it’s time to get a real diagnosis.
Knowing these differences empowers you. It helps you understand when to follow your home exercise plan and when to hit pause and call in an expert. This is how you ensure your path to healing your shoulder without surgery is both safe and successful.
Your Phased Home Exercise and Recovery Program
This is where the real work of healing begins. A structured, phased home exercise program is what separates a frustrating, lingering injury from a successful return to your life. This approach isn't guesswork; it mirrors what we do in the clinic, using progressive, safe movements to build strength without causing setbacks.
The golden rule is to listen to your body and never push into sharp pain. Think of this process not as forcing your shoulder to heal, but as creating the perfect environment for it to heal itself. We’ll move through stages, ensuring each step builds a solid foundation for the next.
This visual guide breaks down the basic structures involved in a rotator cuff injury, from the bones of the shoulder joint to the muscles and potential tears.
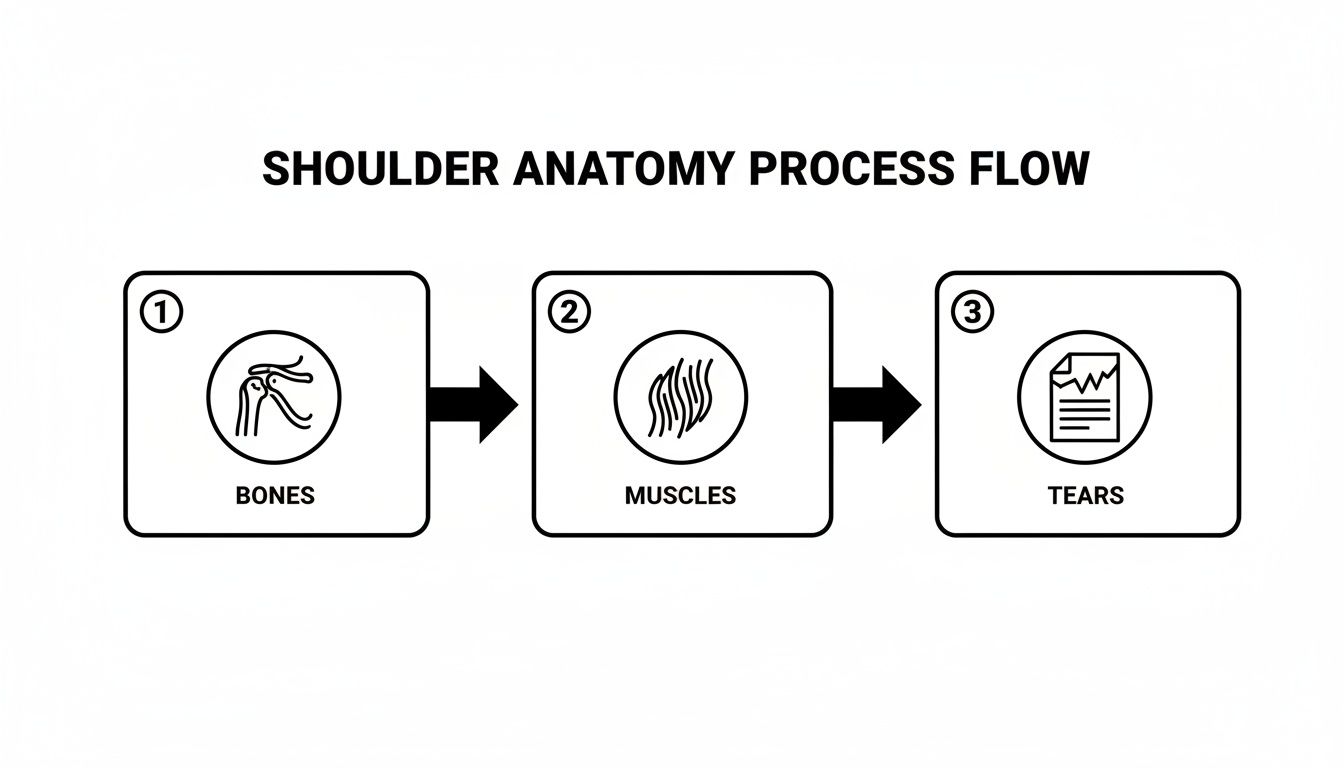
Understanding this progression from healthy bone and muscle to a damaged tendon highlights why a phased recovery program is so critical for healing.
Phase 1: Gentle Motion and Pain Reduction
Right now, it’s all about calming the injured area and restoring pain-free movement. Your goal isn't building strength—it's about gently reintroducing motion, improving blood flow, and easing stiffness. If an exercise causes pain, stop immediately.
- Pendulum Swings: This is the cornerstone of early recovery. Lean forward and support your good arm on a table. Let your injured arm hang straight down like a pendulum. Gently swing the arm forward and back, then side to side, and finally in small circles. The movement should come from your body’s momentum, not from actively using your shoulder muscles. Perform for 1-2 minutes, several times a day.
- Passive External Rotation: Lie on your back with your elbow bent at 90 degrees and tucked into your side. Hold a light stick (a cane or broom handle works well) in both hands. Use your good arm to gently push the stick, which will rotate your injured arm outward. Go only until you feel a gentle stretch, hold for a few seconds, and return to the start. Aim for 10-15 repetitions.
These exercises should feel like a relief, not a workout. They are designed to prevent the shoulder from "freezing up" while the initial inflammation calms down.
Phase 2: Isometric Activation
Once you have more pain-free range of motion, you can start waking up the rotator cuff muscles without actually moving the joint. This is called isometric strengthening. It’s like turning on the engine without putting the car in gear—it gets the muscles firing safely.
The principle is simple: you'll press against an immovable object. Hold each contraction for 5-7 seconds, rest, and repeat 8-10 times.
- External Rotation Isometrics: Stand in a doorway with your injured arm’s elbow bent to 90 degrees. Place the back of your hand against the doorframe. Gently press outward, as if trying to rotate your arm away from your body. You should feel the muscles on the back of your shoulder engage.
- Internal Rotation Isometrics: Now, turn and face the other way. Place the palm of your hand against the other side of the doorframe. Gently press inward, as if trying to rotate your arm across your stomach.
- Abduction Isometrics: Stand with your side to a wall. Make a fist and press the outside of your arm into the wall, as if trying to lift your arm out to the side.
Key Insight: Isometric exercises are a crucial bridge. They retrain the connection between your brain and your muscles (neuromuscular control) without stressing the healing tendon, preparing it for the real work ahead.
Phase 3: Isotonic and Scapular Strengthening
This is where you start building real, functional strength. Isotonic exercises involve moving the joint through its range of motion against resistance—we'll use light resistance bands for this. Just as important is strengthening the muscles around your shoulder blade (scapula). They provide a stable platform for the rotator cuff to work from. In fact, a weak foundation is a common reason rotator cuff injuries happen in the first place.
Rotator Cuff Strengthening (Use a light resistance band):
- External Rotation: Anchor a resistance band at waist height. Stand sideways to the anchor point, holding the band with your injured arm. Keep your elbow tucked into your side at a 90-degree angle. Slowly rotate your forearm outward, pulling against the band. Control the movement back to the start.
- Internal Rotation: Face the other way. Now, pull the band inward across your body, keeping that elbow locked at your side.
Scapular Strengthening:
- Rows: Anchor the band in front of you. Hold the band with both hands, arms extended. Pull the band back toward your chest, focusing on squeezing your shoulder blades together.
- Wall Push-Ups: Stand facing a wall, about arm's length away. Place your hands on the wall just wider than your shoulders. Slowly bend your elbows to bring your body closer to the wall, then push back. Feel your shoulder blades moving on your ribcage.
For those who find anchoring bands difficult, learning about tools like an over-the-door pulley exerciser can offer a convenient alternative for some of these motions.
Start with one set of 10-12 repetitions for each exercise. As you get stronger without pain, you can gradually increase to two or three sets. This steady, phased approach is the most reliable path to reclaiming control over your shoulder's health.
How Professional Therapy Can Speed Up Healing
Your home exercise plan is the single most important part of your recovery. It builds a foundation of strength and control. But when you add professional therapies into the mix, you can often get results much faster and more completely.
Think of it this way: choosing a non-surgical path doesn’t mean you have to go it alone. In fact, professionally guided care often gets you feeling better, faster. A 2020 study found that patients in a structured non-operative program had better initial outcomes than surgical patients, with over 80% seeing major improvements in pain and function. You can see the numbers for yourself in the full study findings on non-surgical rotator cuff outcomes.
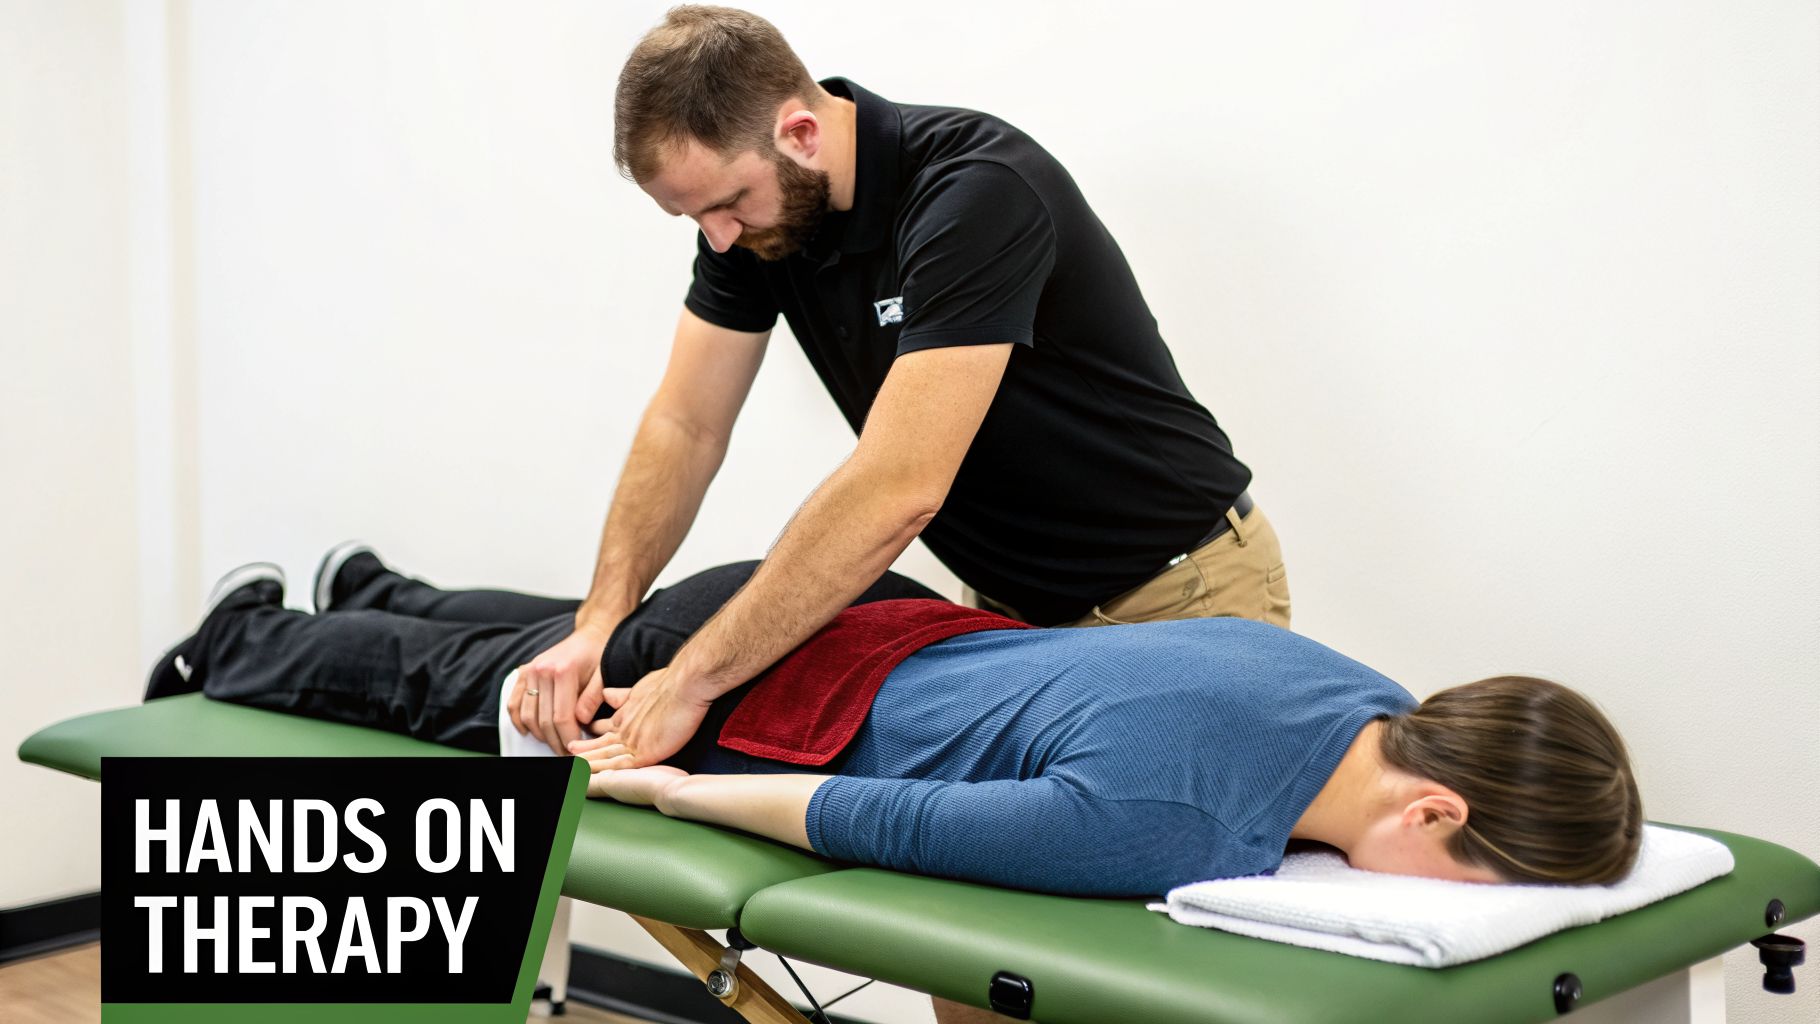
The Power of Hands-On Physical Therapy
A great physical therapist does more than just hand you a list of exercises. They use hands-on techniques—what we call manual therapy—that can be a true game-changer for a painful shoulder. These methods get right to the source of the problem.
- Soft Tissue Mobilization: This is like a highly specific, therapeutic massage. Your therapist uses their hands to find and release tight muscles and break up sticky scar tissue around the shoulder. This improves blood flow and can provide immediate pain relief.
- Joint Mobilization: Using gentle, guided movements, your therapist can restore the natural slide and glide of the bones in your shoulder joint. This is fantastic for reducing that "pinching" feeling from impingement and quickly improving your range of motion.
This hands-on work helps to reset your nervous system. After an injury, your muscles often get stuck in a painful, protective spasm. Manual therapy helps break that cycle. It’s a core principle of what we do, and you can learn more by reading about what is neuromuscular re-education.
Real-World Impact: Think of your shoulder as a rusty door hinge. Your exercises strengthen the door and the wall, which is essential. Manual therapy is like a specialist applying oil directly into the hinge, getting it moving smoothly again almost instantly.
Advanced Modalities to Kickstart Healing
Sometimes, an injury is just plain stubborn. For chronic tendinitis or pain that isn’t responding to the basics, we can bring in some advanced tools to wake up the body's own healing systems.
Extracorporeal Shockwave Therapy (ESWT): This sounds intense, but it's a safe, non-invasive treatment. It uses acoustic sound waves to target the injured tendon. This creates a tiny, controlled trauma that tells your body, "Hey, we need to restart the healing process here!" It boosts blood flow and can even break down calcifications that form in long-term injuries. We find it works especially well for rotator cuff pain that has been around for months.
Chiropractic Care: A shoulder injury rarely exists in isolation. You start compensating, hiking your shoulder or twisting your torso, which can throw your neck and upper back out of alignment. A chiropractor can perform adjustments to restore proper spinal mechanics, taking pressure off nerves and making sure your entire support system—from spine to shoulder—is working as a team.
Acupuncture: People have used acupuncture for pain relief for centuries, and it can be a powerful ally for rotator cuff pain. By placing tiny needles at specific points, it helps the body release its own natural pain-relieving chemicals and reduces inflammation. For many patients, this relief is what finally allows them to perform their rehab exercises without constant pain.
When you combine your dedicated home program with these professional interventions, you’re attacking the problem from every angle. It’s a powerful one-two punch that gives you the absolute best shot at healing your rotator cuff without surgery. And for those interested in the very latest approaches, you might explore a masterclass on healing injuries with advanced therapies like peptides and stem cells.
Building a Bulletproof Shoulder for the Long Term
You’ve made it through rehab, and your shoulder is finally feeling better. That's a huge win, but the work isn't quite done. Getting out of pain is one thing; keeping it from coming back is another. The real goal is to shift your mindset from short-term recovery to long-term resilience.
Building a "bulletproof" shoulder means creating smarter habits. It's about being proactive so all the hard work you put into healing your rotator cuff actually lasts. This lets you get back to your life with confidence, without that nagging fear of re-injury.
Keep Your Shoulder Strong and Stable
The strength you gained in physical therapy won't stick around on its own. If you stop working them, those vital rotator cuff and scapular muscles will weaken, leaving your shoulder vulnerable all over again. You don't need to do your full rehab routine forever, but you do need to make some key exercises a permanent part of your fitness plan.
- Your Maintenance Routine: Think of this like changing the oil in your car. Aim to do your core strengthening exercises—like band rotations and rows—about 2-3 times per week.
- Focus on the Foundation: Don’t forget about the muscles around your shoulder blade. Exercises like wall push-ups and scapular squeezes are critical for maintaining the stable base your rotator cuff relies on to work correctly. A weak foundation forces the rotator cuff to do too much work.
A proper warm-up is also one of your best defenses. When building a bulletproof shoulder for the long term, it's crucial to understand how to warm up before lifting. A cold, unprepared muscle is just asking for a strain or tear.
Smart Ergonomics for Daily Life
Many rotator cuff issues don't come from one big injury. They build up from thousands of tiny, repetitive movements over months or years. Your daily environment, especially your desk setup, can be a huge part of the problem. A few simple ergonomic tweaks can make a world of difference.
Try making these small changes:
- Your Workstation: Set your computer monitor at eye level. Keep your keyboard close enough that your elbows can rest comfortably by your sides instead of constantly reaching forward.
- Lifting Habits: When you lift anything—a bag of groceries, a case of water, your toddler—keep the object close to your body. Bend your knees and lift with your legs, not your back and shoulders.
Key Takeaway: Prevention is an active, daily process. It’s about being mindful of how you move not just in the gym, but while you're sitting at your desk, doing chores, or carrying groceries.
Returning to Activity Safely
Getting back to the things you love, whether that's tennis, swimming, or just working in the garden, is the ultimate goal. But jumping back in too fast is one of the most common mistakes we see, and it often leads to a frustrating setback. A gradual, planned return is the only way to go.
Before you go all-out, run through this quick checklist to see if you're ready:
- Pain-Free Daily Life: Can you get dressed, reach into a high cabinet, and sleep through the night without any pain?
- Full Range of Motion: Have you regained your full, pain-free mobility? Does your injured shoulder move just as well as your uninjured one?
- Symmetrical Strength: Is the strength in your injured arm feeling almost identical to your good arm? You should be able to do your maintenance exercises easily.
If you can confidently say "yes" to all three, you're probably ready to start easing back in. For a golfer, this might mean starting with chipping and putting before hitting the driving range. For a swimmer, it might be doing shorter sets with perfect form.
This slow-and-steady approach is proven to work, even for more significant injuries. For example, one 2023 study found that 42% of patients with traumatic full-thickness tears who opted out of surgery were still managing their condition successfully after more than four years. Their success really shows the power of a well-executed conservative plan. You can read the full research about these non-surgical outcomes and see for yourself. By sticking with these long-term strategies, you're putting yourself in the best position to become another success story.
Common Questions About Non-Surgical Recovery
When you’re facing a rotator cuff injury, it’s completely normal to have a ton of questions. Trying to figure out a recovery plan without surgery can feel overwhelming, but getting clear on what to expect is the first step.
Knowing the answers helps you set realistic goals and, most importantly, commit to your rehab plan with confidence. That commitment is often the secret ingredient to a great outcome.
How Long Does It Take to Heal a Rotator Cuff Injury Without Surgery?
There’s no single answer here—your timeline really depends on the injury, your age, and how consistently you stick with your exercises. Every shoulder is different.
Minor Strains or Tendinitis: For general inflammation or a minor strain, you can often feel a huge difference within 4 to 6 weeks of consistent, gentle work. The goal is simply to calm things down and get your arm moving without pain again.
Significant Partial Tears: If you're dealing with a more serious partial tear, the road is a bit longer. You're likely looking at 3 to 6 months of dedicated physical therapy and home exercises. While you’ll probably see big improvements in those first few months, getting back to 100% strength can sometimes take up to a year.
Patience is everything. Rushing the process is the most common reason for setbacks, so you have to give your body the time it needs to heal and adapt.
Can a Full-Thickness Rotator Cuff Tear Heal Without Surgery?
Yes, and this surprises a lot of people. A large number of full-thickness tears can be managed incredibly well without ever seeing a surgeon. In fact, research shows that around 75% of patients with chronic full-thickness tears get excellent results from a structured physical therapy program.
The goal of non-surgical treatment isn't to magically reattach the tendon. Instead, we focus on strengthening the other rotator cuff muscles and the bigger muscles around your shoulder blade. They learn to pick up the slack, compensating for the tear to eliminate pain and restore full function.
Surgery is typically reserved for very specific situations, like a sudden, traumatic tear in a younger, highly active person, or when a solid, conservative plan just isn't getting the job done.
What Happens If I Ignore My Rotator Cuff Injury?
Ignoring shoulder pain is a bad gamble. An untreated rotator cuff problem rarely gets better on its own and can lead to a domino effect of issues that are much tougher to fix later on.
Pushing through the pain can turn a small, manageable tear into a large, complex one. Over time, the injured muscle starts to weaken and can undergo fatty atrophy—a process where the muscle tissue is slowly replaced by fat. Once that happens, even surgery becomes far more difficult and much less likely to succeed. Acting early gives you the best shot at a full recovery and helps you avoid a future of chronic pain and permanent weakness.
Is It Okay to Use a Cortisone Shot for My Pain?
A cortisone shot can be a very helpful tool, but it's important to understand what it does and doesn't do. It’s not a cure. The injection delivers a powerful anti-inflammatory right to the source of the pain, which can provide fantastic short-term relief.
This relief can break a vicious pain cycle, help you sleep, and—most importantly—allow you to actually participate in your physical therapy without wincing. Think of it as a bridge that gets you to the starting line of your rehab program, not the finish line. Because repeated injections can weaken tendon tissue over time, we use them sparingly and strategically.
At MedAmerica Rehab Center, our team of licensed physical therapists and doctors has been helping people in Deerfield Beach recover from shoulder injuries since 1995. We build personalized, hands-on treatment plans designed to get you out of pain and back to your life—without surgery. If you're ready to take control of your recovery, visit us at https://www.medamericarehab.com to schedule your appointment.