Dislocated Shoulder Rehab: Your Fast Recovery Guide (dislocated shoulder rehab)
A shoulder dislocation is one of those injuries you don't forget. The pain is intense, the joint feels alarmingly unstable, and it’s clear something is very wrong. Your first moves in the minutes and hours that follow are absolutely critical. The goal is to get the joint safely put back in its socket—a process called reduction—and then give it the uninterrupted rest it needs to start healing.
What To Do Immediately After a Shoulder Dislocation
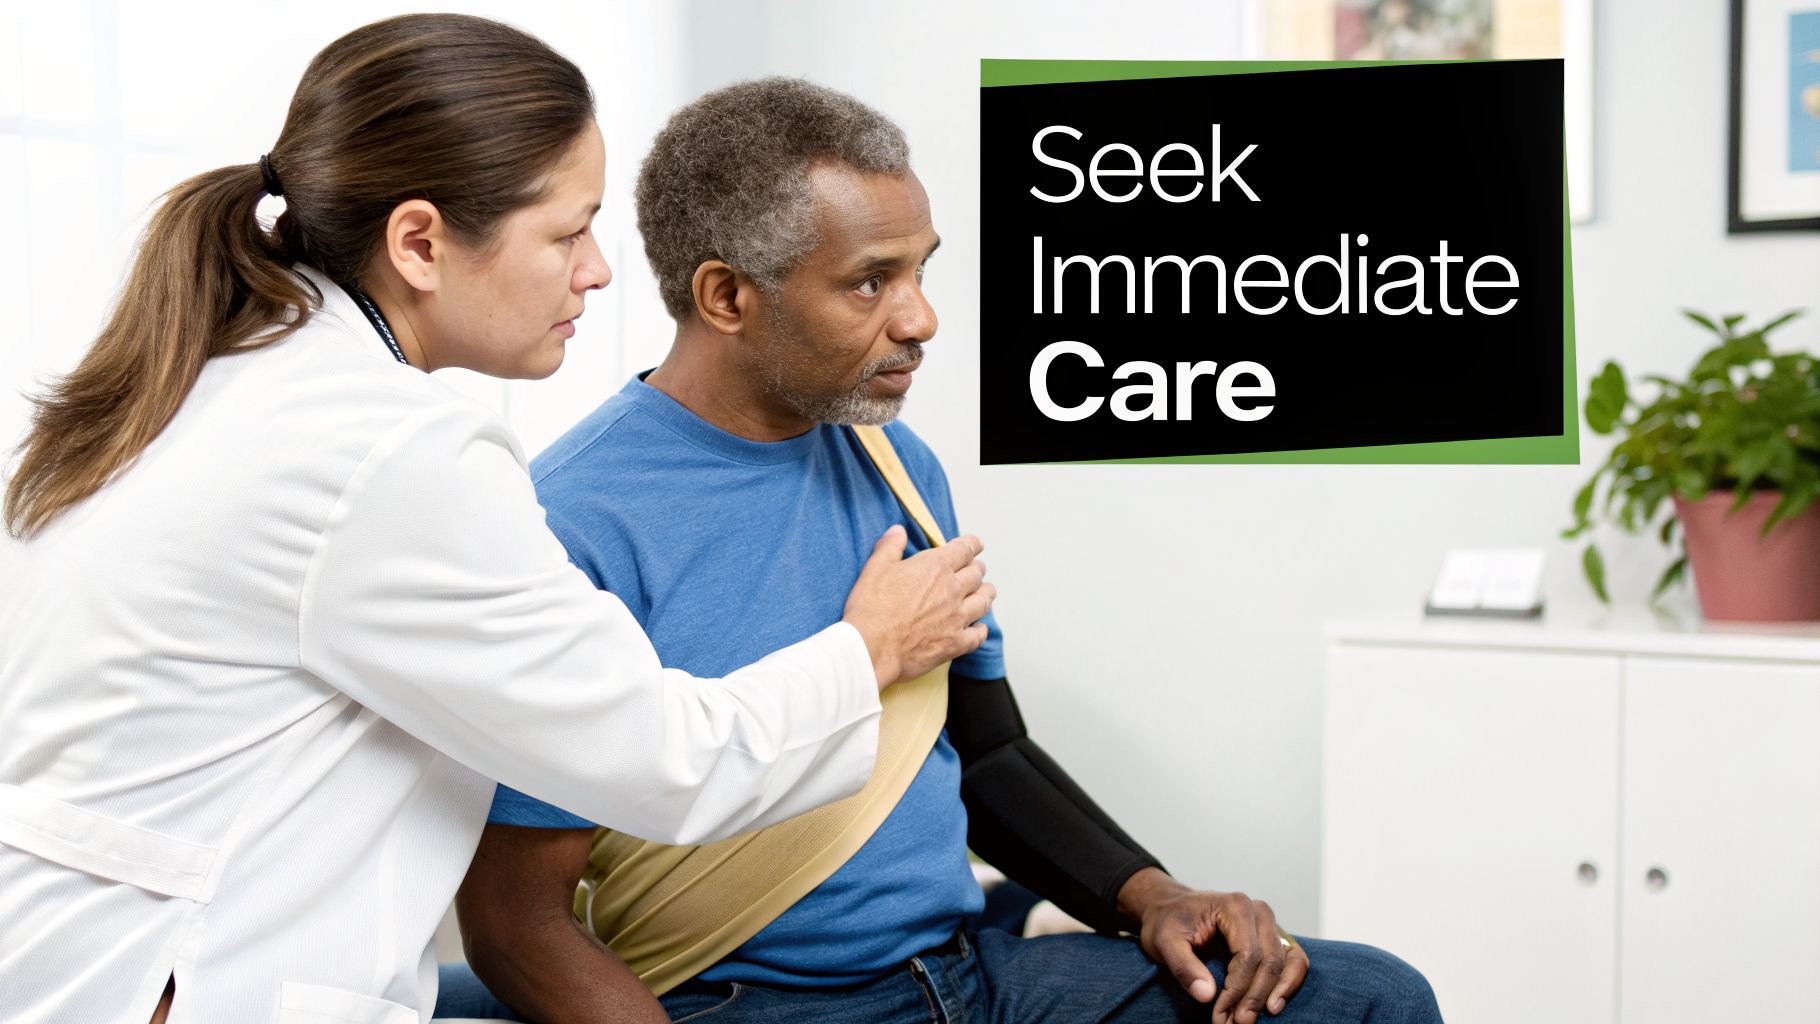
When your shoulder pops out, your first instinct might be panic or a desperate urge to fix it. The most important thing you can do is stay as calm as possible and get to an emergency room or urgent care clinic right away.
Whatever you do, don't try to pop it back in yourself. Letting an untrained friend have a go is an even worse idea. This can easily cause serious, lasting damage to the nerves, blood vessels, and ligaments around the joint. This is a job for a medical professional, period.
A doctor will perform what's called a closed reduction, carefully maneuvering your arm to guide the head of the humerus bone back into the shoulder socket. They'll often use pain medication or a sedative to help your muscles relax, which makes the process much smoother and less painful.
The All-Important Immobilization Phase
Once the shoulder is back in place, you’ll be fitted for a sling. Think of this sling as your most important piece of recovery equipment for the next few weeks. It’s not just for comfort; it holds your arm in a stable position so the stretched and torn tissues can finally begin to heal without being disturbed.
You'll need to wear the sling as instructed, which is typically for 1 to 3 weeks. I can't stress this enough: taking it off too soon is a huge gamble. It can stop the healing process in its tracks and dramatically increase your chances of another dislocation down the road.
While your shoulder is immobilized, your main job is to manage the pain and swelling. The classic RICE method is your best friend here:
- Rest: Stop doing anything that causes even a twinge of pain in your shoulder.
- Ice: Apply a cold pack for 15-20 minutes every couple of hours. We have a great guide on how to use ice packs effectively for physical therapy.
- Compression: The sling itself provides some gentle compression.
- Elevation: When you’re resting, use pillows to keep your shoulder propped up above the level of your heart.
To help you remember the crucial first steps, here's a quick reference guide on what to focus on—and what to avoid at all costs.
Immediate Post-Dislocation Dos and Don'ts
| Do | Don't |
|---|---|
| Seek immediate medical attention. | Try to "pop" it back in yourself. |
| Support the arm in a comfortable position. | Let a non-medical person attempt a reduction. |
| Apply ice to the shoulder to reduce swelling. | Eat or drink anything (in case you need sedation). |
| Follow all of your doctor's instructions for the sling. | Move the arm unnecessarily. |
Following these simple rules can prevent major complications and set you up for a much smoother recovery journey.
A Few Key Facts on Shoulder Dislocations
If you're dealing with this injury, you're not alone. Shoulder dislocations account for nearly two million emergency room visits in the U.S. every year. It’s an injury that’s almost three times more common in men, especially those between 20-29.
But here’s the good news: when a trained emergency physician performs the reduction, the procedure has a 92.2% success rate. This gets the joint back where it belongs, paving the way for the real work of rehabilitation to begin.
Restoring Gentle Movement and Mobility

Once your doctor gives you the all-clear, it’s time to start moving again. This is what we call the "protected motion" phase, and it's a huge milestone in your recovery.
After being stuck in a sling, your shoulder joint is going to be incredibly stiff. Our goal now is to gently reintroduce movement. This helps prevent a painful "frozen shoulder" while giving the damaged ligaments and capsule time to finish healing.
Finding the right balance is everything. Moving too much too soon is just as risky as not moving enough. This is where professional guidance really pays off. I've seen it with so many people, from athletes to weekend warriors, who are anxious to get back to normal. Patience during this phase is the true key to building a strong, resilient joint and avoiding frustrating setbacks down the road.
A dislocation causes a lot of trauma to the soft tissues. As you start this next phase, it helps to understand how to treat sprains and strains so you can respect the healing process.
Early Motion Exercises for Your Shoulder
The very first movements you'll do are either passive or actively assisted. This just means your injured arm is doing little to no work on its own. The focus is purely on regaining motion, not building strength. Not yet.
Key Insight: Let pain be your guide. A gentle pulling or stretching feeling is good—that's productive. Sharp, stabbing, or pinching pain is your body's signal to stop immediately and back off. Pushing through that kind of pain can re-injure the healing tissue.
The exercises below are the foundation of this early phase. They're designed to be extremely gentle and are often the first things we prescribe in a formal physical therapy program.
Pendulum Swings
This is almost always the first exercise we clear people to do. It uses gravity to gently open up the joint, which provides some nice pain relief and coaxes back that initial movement.
- Start by leaning forward, resting your good hand on a table or countertop for support. Let your injured arm hang straight down toward the floor like a rope.
- Completely relax your shoulder muscles. The arm should feel like a dead weight.
- Now, use your body to start a gentle swinging motion—rocking forward and backward, side to side, and then in small circles.
- The key is that your body is doing the rocking, not your shoulder muscles. Let the arm swing passively. Do this for 1-2 minutes at a time, several times a day.
Passive External Rotation with a Stick
This movement is vital. After a dislocation, the ability to rotate your arm outward is one of the first things you lose and one of the most important to get back.
- How to do it: Lie on your back with your knees bent. Hold a cane, broomstick, or even an umbrella shaft horizontally with both hands. Keep the elbow of your injured arm bent at 90 degrees and tucked close to your side.
- The motion: Use your good arm to gently push the stick, which will passively rotate your injured arm outward.
- The goal: Go only to the point of a mild stretch. Hold it for 15-30 seconds, then relax. Repeat 5-10 times. As your mobility improves, you’ll find you can go a little further each time.
As you progress, your therapist might recommend specific tools to help. For example, an over-the-door pulley exerciser can be a great tool to assist with motion once you're cleared for it.
Gentle Wall Crawls
Wall crawls are a fantastic and safe way to start regaining your overhead reach in a very controlled way.
Stand facing a wall, about an arm's length away. Place the fingertips of your injured arm on the wall, maybe around shoulder height. Now, slowly "crawl" your fingers up the wall, letting them do the work of lifting your arm.
Go as high as you comfortably can without shrugging your shoulder to cheat. The movement should come from the joint. Hold that top position for a few seconds, then slowly crawl your hand back down.
Building a Strong and Stable Shoulder
Once you’ve regained some gentle movement, the real work begins. This is where we focus on building strength, turning that vulnerable shoulder into one that’s resilient and stable. Think of it as waking up the muscles that protect the joint—specifically your rotator cuff and the muscles around your shoulder blade—and teaching them to do their job again.
This isn’t about jumping into heavy lifting. We start slow, reactivating the muscles with gentle contractions, and only then do we gradually add resistance to build real, lasting strength.
The Foundation: Isometrics
The very first step in rebuilding strength is with isometrics. This just means you’re contracting the muscle without actually moving your arm. It's a fantastic and safe way to get those muscles firing again without putting any stress on the healing joint.
Imagine pressing your hand against a wall. The wall doesn't move, but you can feel your muscles working. That’s an isometric contraction.
Here’s how to apply this to your shoulder:
- External Rotation: Stand in a doorway, bend your injured arm to 90 degrees, and keep your elbow tucked into your side. Gently press the back of your hand against the doorframe as if you were trying to rotate your arm outward. Hold for 5-10 seconds and relax.
- Internal Rotation: Turn around to face the other side of the doorframe. With your arm in the same position, press your palm into the frame as if rotating inward. Hold for 5-10 seconds.
- Abduction (Lifting Out): Stand sideways to a wall. With your arm straight down at your side, press the outside of your arm into the wall. Hold for 5-10 seconds.
The key here is effort, not movement. You should feel the muscle engage, but there should never be any joint motion or pain. Aim to do 10-15 repetitions of each exercise every day.
Progressing to Resistance Bands
When you can do the isometrics without pain and your mobility is improving, it's time to bring in some light resistance. This is where we introduce isotonic exercises, which means contracting the muscle through a range of motion, usually with resistance bands.
Bands are perfect for this phase because they offer controlled tension. The goal isn’t to grab the heaviest band you can find. It’s all about slow, controlled movements with perfect form. This makes sure you’re hitting those small, deep stabilizing muscles instead of just the big ones on the surface.
A common mistake I see is people using their whole body to cheat the movement. If you find yourself swinging your torso to complete a rep, the band is too heavy. The motion has to come purely from the shoulder joint.
Here are a few essential band exercises for your recovery:
- Band-Resisted External Rotation: Attach a light band to a doorknob. Stand sideways, holding the band with your injured arm. Keep your elbow bent to 90 degrees and locked at your side (placing a small rolled-up towel between your elbow and your body is a great trick to ensure it stays put). Slowly rotate your forearm away from your body, pause, and then slowly return to the starting position.
- Band-Resisted Internal Rotation: Simply face the other direction and repeat the same movement, this time pulling the band across your stomach. The control on the way back is just as important as the pull itself.
- Scapular Rows: Face the doorknob, holding the band with your arm straight out. The first move is to pull your shoulder blade back and down, almost like you’re trying to tuck it into your opposite back pocket. Then, pull the band toward your chest, keeping your elbow tight to your body.
Start with a light band and aim for 2-3 sets of 10-15 repetitions. Focus completely on quality form. As the exercises get easier, you can move up to a band with more resistance.
The Role of Integrated Care
Strengthening doesn’t happen in a vacuum. The muscles around your shoulder blade (scapula), in your upper back, and even your core all work together to give your shoulder a solid foundation to move from. This is why an integrated approach, like the one we take here at MedAmerica Rehab, is so important.
Our physical therapists make sure your exercise plan is balanced and progressing correctly. At the same time, our chiropractors can address any underlying postural issues or misalignments in your neck and upper back that could be hurting your shoulder mechanics. When your body is properly aligned, the right muscles can fire at the right time—which is critical for a full recovery.
This approach often includes something called neuromuscular re-education, which is a way of retraining the communication lines between your brain and your muscles. You can understand more about what neuromuscular re-education involves in our detailed article. By building both strength and control, we help you create a shoulder that is not only strong but also "smart"—one that can react instinctively to prevent injuries down the road.
Advanced Rehab: Getting Back in the Game
You’ve put in the work. The initial pain has faded, and you can raise your arm again without wincing. But there's still a sense of hesitation. That feeling of "not quite trusting it" is common, and it’s what this final phase of rehab is all about.
Now, we shift from building basic strength to teaching your shoulder how to be smart, stable, and ready for the real world—whether that’s a tennis serve, lifting a heavy box, or just grabbing something quickly off a high shelf.
The key is restoring your shoulder's proprioception. Think of it as the joint's internal GPS. It's a system of nerves that tells your brain exactly where your arm is without you having to look. After a dislocation, that system gets scrambled. The signals are slow and unreliable, which is why a shoulder can feel "dumb" or unstable even when the muscles feel strong. Our job is to sharpen those reflexes.
Teaching Your Shoulder to Protect Itself
This is where rehab gets more dynamic. We move beyond simple lifting and challenge your joint's reaction time. These drills force the small, deep stabilizer muscles around the socket to fire on instinct, keeping the joint centered and secure. This is what builds a shoulder that can protect itself from another injury.
A physical therapist will introduce exercises that feel less about brute force and more about control and balance.
Some of these drills might include:
- Single-Arm Planks: Holding a plank on your forearms or hands puts steady, stabilizing pressure through the shoulder. Doing this on your recovering side forces all those little muscles to work together to keep the joint from wobbling.
- Ball on Wall Circles: You’ll stand facing a wall, pressing a small therapy ball into it with your palm. Then, you make small, slow circles with the ball, first clockwise, then counter-clockwise. It's a great way to fine-tune control under a light load.
- Rhythmic Stabilization: This is one we often do in the clinic. You’ll hold your arm out while your therapist gives it light, random taps from different angles. Your job is to instinctively tighten up and keep your arm perfectly still.
These exercises are crucial for rebuilding that brain-to-muscle connection, which is your best defense against another dislocation.
A Quick Note on Mindset: Returning to your sport isn’t just a single moment—it's a process. Being able to get through sport-specific drills without pain or fear is just as important as hitting strength goals. This builds both physical readiness and the confidence you need to get back out there.
The image below gives a simple overview of how we build the strength needed to even attempt these advanced drills.
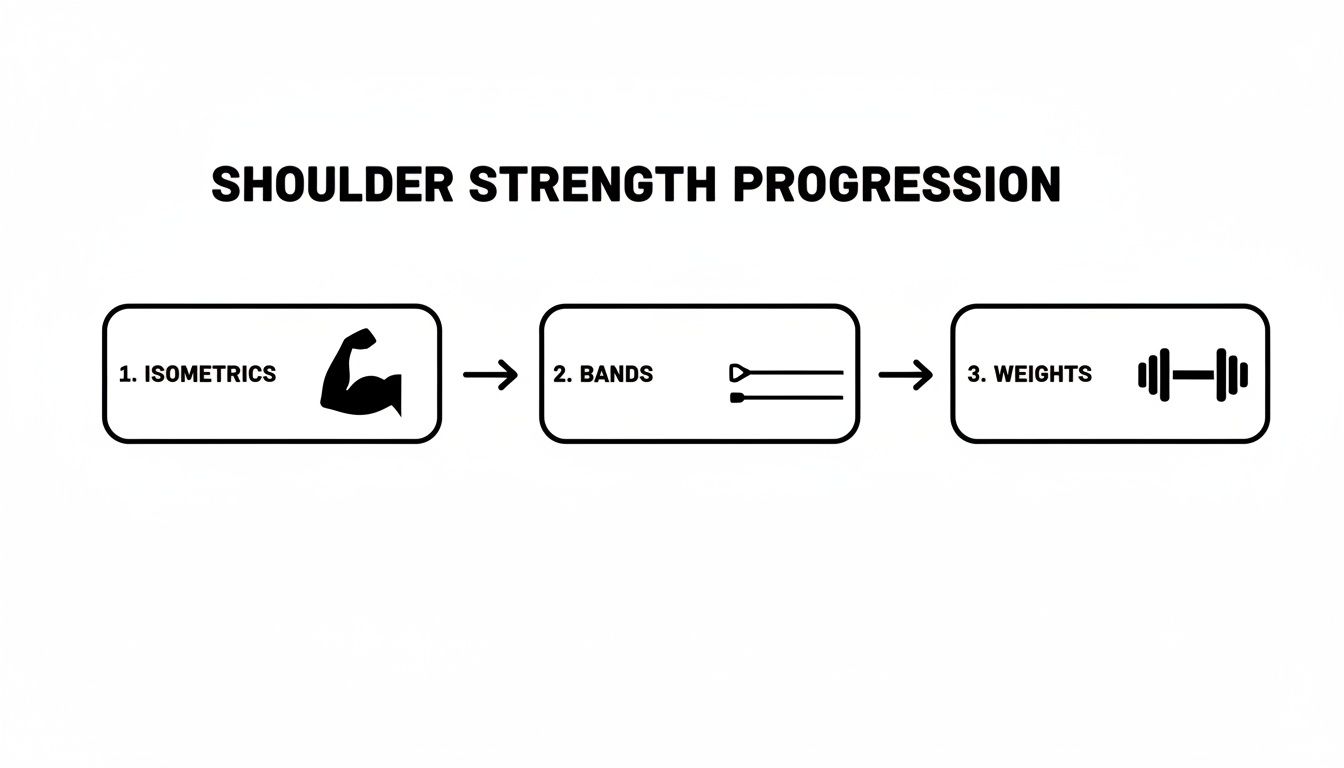
As you can see, a good rehab plan starts with the basics—just getting the muscles to fire—before adding resistance and then, finally, tackling these more complex, dynamic movements.
Your Return-to-Activity Checklist
So, how do you know you’re really ready? It's not just about how many weeks have passed. Jumping back in too soon is one of the biggest reasons people re-injure their shoulders. We have to be sure the joint can handle the stress.
To take the guesswork out of it, your physical therapist will use specific tests to see if you’ve met the key milestones for a safe return. The table below outlines what we look for before clearing someone for high-demand activities.
Return-to-Activity Checklist
| Milestone | What It Means | How It's Tested |
|---|---|---|
| Full, Pain-Free Range of Motion | You can move your injured shoulder in all directions just as far as your uninjured side, without any pinching or pain. | Your therapist will use a goniometer to measure your joint angles and compare them to the uninjured side. |
| Symmetrical Strength | The muscles of your injured shoulder are at least 90% as strong as those on your uninjured side. | This is tested using handheld dynamometers or by assessing the number of reps you can do with a specific weight. |
| No Apprehension or Instability | You don't feel a sense of unease or slipping when your arm is placed in vulnerable positions (e.g., in a throwing motion). | The "Apprehension Test" where a therapist carefully moves your arm into a high-risk position while monitoring your reaction. |
| Successful Functional Testing | You can perform movements specific to your sport or activity repeatedly without pain, fatigue, or compensation. | Examples include completing a throwing program, performing push-ups, or acing overhead lifting drills. |
Hitting these benchmarks is your green light. It’s confirmation that your rehab has done its job, restoring not just the strength of your shoulder, but its intelligence and stability. This is what lets you get back to the activities you love with confidence.
How Professional Guidance Accelerates Your Recovery
Following a list of exercises is a start, but it’s only one piece of the puzzle. The real difference between a slow, frustrating recovery and a fast, confident one comes down to getting professional, hands-on care.
A generic printout from the internet can't see how you move. It can't feel where your joint is stiff, identify your unique compensation patterns, or adjust the plan based on your body’s feedback. That’s where a dedicated clinical team makes all the difference.
At MedAmerica Rehab, we bring multiple disciplines together to create a recovery roadmap built just for you. This isn't about just getting back to normal; it’s about making your shoulder stronger and more stable than it was before the injury.
The Power of Hands-On Manual Therapy
One of the most important parts of our physical therapy approach is manual therapy. This is where your therapist uses their hands to work directly on your shoulder joint and the surrounding muscles and ligaments. After a dislocation, the joint capsule can get tight in some spots and too loose in others.
Your therapist can use specific joint mobilizations to gently guide the shoulder back into its proper gliding motion. They also use soft tissue techniques to release muscle knots, break down scar tissue, and get blood flowing to the area. This direct approach can relieve pain and restore motion much faster than stretching on your own.
Expert Insight: Manual therapy is a game-changer because it addresses the "hardware" of the joint. Exercises strengthen the muscles, but manual techniques ensure the joint itself is moving correctly, providing a better foundation for those muscles to work from.
Making Sure Your Whole Body Supports Your Shoulder
A shoulder injury is rarely just about the shoulder. Your body is incredibly good at compensating. To avoid pain, you might start hunching your back or tilting your torso without even realizing it. Over time, these habits can create new problems in your neck and upper back.
When your neck and back are stiff, they can stop your shoulder from healing correctly. This is exactly why our integrated care includes chiropractic. Our team's chiropractor will assess your spinal alignment and posture to make sure everything is moving the way it should.
- Better Posture: If your upper back is stiff and rounded, your shoulder blade can't move freely, which puts the shoulder joint in a weak position.
- Clear Nerve Pathways: Misalignments in the spine can also interfere with the nerves that fire up your shoulder muscles, making it harder for them to stabilize the joint.
By getting your body’s entire support structure working together, we remove the hidden roadblocks that can easily stall your recovery.
Using Advanced Tools for Faster Healing
Sometimes, your body's natural healing process needs a little push. While exercises are the core of your rehab, we can use advanced therapeutic modalities to speed up tissue repair, especially for stubborn injuries.
One of the tools we often use is shockwave therapy. This non-invasive treatment sends acoustic waves into the injured tissue, which stimulates a powerful healing response. It boosts blood flow and helps the body rebuild, making it especially good for breaking down old scar tissue and repairing damaged ligaments.
By adding these advanced tools to your plan when needed, we can often get you back to your life faster and more safely than with exercise alone. Professional guidance isn't just about a quicker recovery—it's about a more complete one that dramatically cuts your risk of another dislocation down the road.
Common Questions About Dislocated Shoulder Rehab
A dislocated shoulder is a major disruption, and it’s completely normal to have a lot of questions once the initial crisis is over. Navigating the recovery can feel confusing, and knowing what to expect makes a huge difference.
Here at our Deerfield Beach clinic, we hear the same concerns from patients every day. We'll walk you through the answers to the most common questions about timelines, pain, and getting back to your life.
How Long Does Dislocated Shoulder Rehab Usually Take?
This is always the first question, and the honest answer is: it depends. A full recovery timeline can shift based on the severity of the dislocation, your age, your overall health, and whether you're an athlete or have a physically demanding job.
That said, we can map out a general framework.
- Immobilization: You can expect to wear a sling for 1-3 weeks. This is non-negotiable and gives the damaged tissues a chance to begin healing.
- Early Rehab: The following 4-6 weeks are all about gently restoring your range of motion and starting very basic strengthening exercises.
- Full Return: Getting back to high-impact sports or heavy lifting is a longer game. This can take anywhere from 3 to 6 months, sometimes more.
Working with a physical therapist is the key to creating a timeline that’s right for you. They’ll ensure you’re progressing safely without pushing the joint before it’s ready.
Will I Need Surgery After a Shoulder Dislocation?
Not always. In fact, we successfully treat most first-time dislocations with a structured dislocated shoulder rehab program. The main goal of this conservative approach is to build up the muscles around the joint, creating what we call "dynamic stability" to make up for any ligaments that were stretched out.
Surgery usually comes into the picture under specific circumstances:
- You start having recurrent dislocations, meaning your shoulder pops out again with minimal force.
- An MRI shows a significant tear to the labrum (the cartilage bumper in your socket) or the ligaments.
- You're a young, high-level athlete who can't risk future dislocations that could be career-ending.
An orthopedic specialist will use imaging to get a clear picture of the damage and help you weigh your options.
Key Takeaway: Rehab is almost always the first and most important step. Surgery is generally reserved for shoulders that remain unstable despite dedicated physical therapy or for major structural tears that can't heal on their own.
Can I Do My Own Physical Therapy at Home?
While your home exercise program is a huge piece of the puzzle, trying to manage the entire rehab process alone is a risky move. A physical therapist does so much more than just hand you an exercise sheet.
We’re trained to diagnose the specific tissues that were injured, spot subtle ways your body is compensating that you’d never notice, and use hands-on manual therapy to get the joint moving correctly again. Trying to progress your exercises too quickly or doing them with poor form is one of the fastest ways to have a setback—or even another dislocation.
Is It Normal to Hear Clicking During Rehab?
Some clicking or popping, especially if there's no pain, can be a normal part of the healing journey. As the initial swelling reduces and tissues start to remodel, the joint surfaces might not glide perfectly smoothly at first.
But you should never just ignore these sounds. Pay close attention to the feeling. If that click comes with a sharp pain, a "catching" sensation, or a feeling that the shoulder is about to give out, you need to tell your physical therapist immediately. It could be a sign that a specific exercise isn't right for you yet, or that something else needs to be addressed.
At MedAmerica Rehab Center, our team in Deerfield Beach focuses on creating smart, personalized recovery plans that help you heal with confidence. If you're dealing with a shoulder injury, schedule your appointment today and let our experts build a plan that gets you back to your life.